
If you’re looking for…
DeAnna’s Favorite Frosted Sugar Cookie Recipe: Taste of Tradition
Kaylie’s Holiday Spinach Squares Recipe: Taste of Tradition
Gift Wrapping Tips: Perfectly Pretty Presents
Decoration Storage Ideas: Garage Storage Ideas

Your trusted Loan Originator
If you’re looking for…
DeAnna’s Favorite Frosted Sugar Cookie Recipe: Taste of Tradition
Kaylie’s Holiday Spinach Squares Recipe: Taste of Tradition
Gift Wrapping Tips: Perfectly Pretty Presents
Decoration Storage Ideas: Garage Storage Ideas
Perhaps a big Christmas tree isn’t your thing – or maybe you like to deck every hall, nook, and cranny. Either way, creating a fun tablescape is sure to make your meals feel even more magical! We will be showing you ways to build your table decor using Amazon below, but there are deals and finds everywhere – including The Dollar Tree and your local Goodwill! Keep an eye out! You can also build your tablescape over time to save money. Collecting something new for your tablescape every year can be a fun way to start celebrating the season.
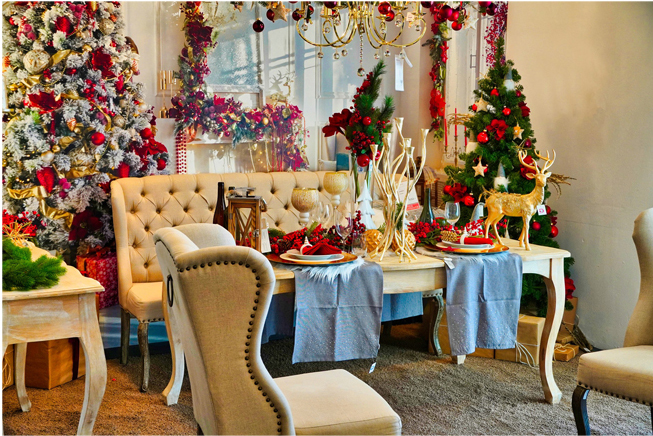
Choose your decor theme. An old Christmas village can become an instant tablescape. Assessing decorations you already have on hand is a great way to save money, and reuse things you may have forgotten about or couldn’t find a good fit for in the past. However, for our example, we are creating a “winter wonder woodland” – so think pine trees, woodland creatures, snow, twinkle lights, etc.
Those are the three keywords for creating a great tablescape. THRILL: These are items that are thrilling to see – your show stopper features – which would include your main centerpiece, and even your dinnerware. SPILL: These items add depth and movement to your design. Think things that “spill” over the edges and along the lengths of your table. Table runners, garland, and twinkle lights are good examples of “spill.” FILL: These are the decorations that “fill-in” your design. For example; ornaments, little knick knacks or figurines, LED candles, tiny trees, pine cones, etc.
SPILL: I’d start with a runner. It should be long enough to drape over the edges. Ideally, it would be fluffy or flowy to simulate snow, if you are using a Christmas Village. Garlands and lights are a good next step. Lighting should be easy to access and small, like these battery operated smaller-than-mini LED twinkle lights. They’re just the right amount of sparkle for the table, and even have versions with remotes. Opt for led candles that flicker and have a remote control so you can turn them on and off easily, without any threat of fire or melting wax.

 PRO TIP: Swap your current Christmas Village light bulbs and candlestick bulbs out for the LED versions. LED bulbs come in all different styles (including the candle style and nightlight type bulbs) and give off little to no heat so you rarely have to worry about them getting too hot. LED bulbs cost less to run, come in warm and cool tones, and usually last longer too!
Next, THRILL: Choose a place setting. You could do this with solid color dishes in the holiday color theme of your choosing, or with dedicated holiday dinnerware. If you want to use your regular everyday plates, consider purchasing festive chargers and complimenting napkins to keep the design cohesive. Napkins and placemats should be subtle (more plain) especially if you have a lot going on in your tablescape. Try to coordinate the colors in your decorations to the plates, chargers, and napkins.
SAVINGS TIP: We found gold, green, and silver plastic chargers at The Dollar Tree that worked perfectly! Can’t beat $1.00!

Then choose coordinating elements to create a centerpiece.

PRO TIP: Consider adding a name card to the plate settings. It’s a magical little touch, as everyone loves seeing their own name nestled into such a pretty setting. It can be as simple as a folded card or as fancy as write-on ceramic figurines like the ones below.

FILL: How many decorations should I buy to fill in my design?

PRO TIP: Those random snow globes you keep receiving as gifts over the years make a great “fill” item!
When in doubt of how many you should get of a particular item, we like to stick to odd numbers. Typically one, three, or five items of each kind. One “thrill”, for example, and three or five “fills.” If you’re creating groups of items, try it in ones and threes. This is also true of breaking up your display – either have one main focus (centerpiece) or three focus areas with the middle being just a little fancier than the ends.

PRO TIP: A cloche or hurricane glasses and cake plates are great for creating little miniature scenes or protecting items.
 The last two years have been hard for a lot of people. If you have family, a friend, or neighbor in need of some holiday cheer, consider some quick set up/low impact yard decorations to quickly brighten their holiday! We found all the options below on Amazon.
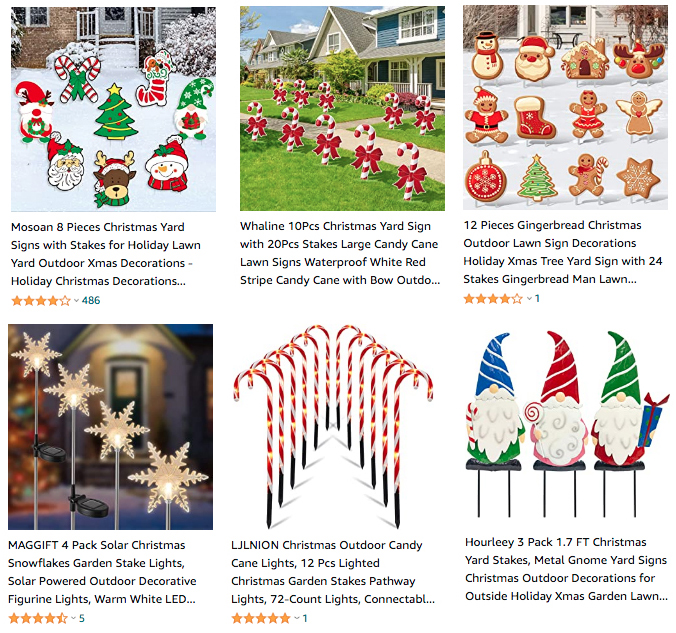
Yard Stakes: Create a cheery little pathway quickly with yard signs. They work just like a yard sale sign, but have holiday phrases and designs like these we found on Amazon. Use a yard stick or the sidewalk seam lines to evenly space the signs and it will look like Santa himself might have been supervising the install!
Solar Options: These can be a little tricky, so be sure to look at reviews. We bought several candy cane striped solar stake lights from Walmart for under $2 a piece. They are tiny little twinkle level of lights at night, but during the day look so festive! Alternate solar stake lights with yard stake signs for more of a visual impact.

Garage Magnets: THESE ARE SO CUTE! We found phrases, ornaments, even reflective oversized Christmas light bulbs that turn a garage into a picture perfect holiday cards!
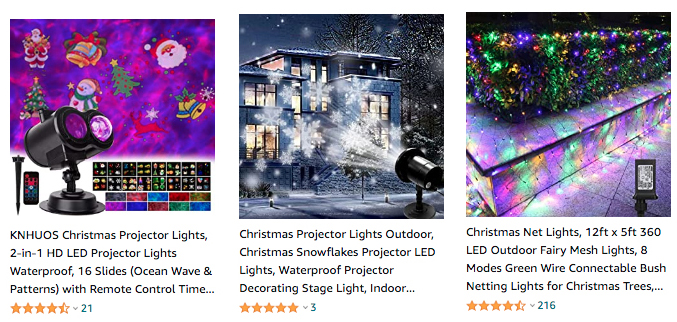
Projector and Kalidescope Globe Lights: These lights flock an entire wall or bushes area in illuminated winter wonder in 5 minutes! Simply stake, plug it in, and go! PRO TIP: Dusk is the best time for set up, as you will not see where it is projecting during the daytime.
Shrubs and Bushes: Net lights set up in a snap when you have two people to help stretch it and place them over bushes.

You can’t go wrong with a fun holiday inflatable! We found the best deals on small ones were at the At Home store. They had many to choose from in the 4’ size starting at just $14.00!
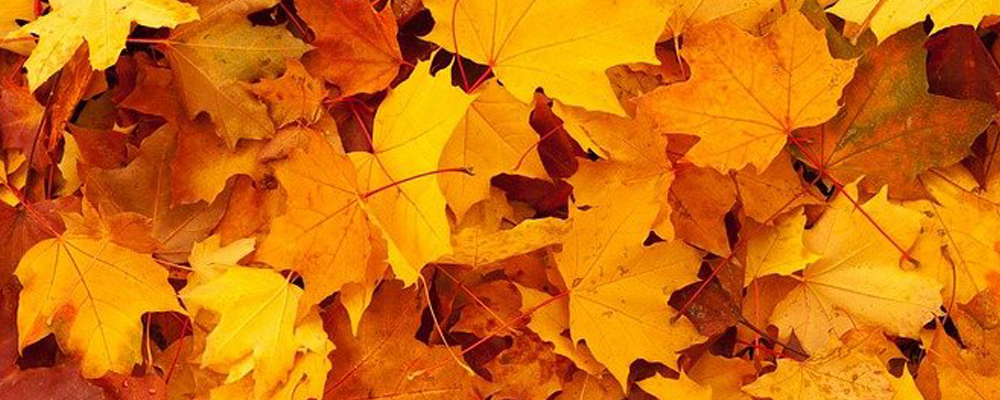
Turns out, MULCHED leaves can be beneficial. Some leaves provide nutrients to soil but most just help to protect the lawn and block weeds. We read this is especially true if you have oak or maple tree leaves. Even if they have no impact to your soil’s nutrients, mulched leaves are found to be the environmentally-friendly solution to facing fall, because it keeps the bagged ones out of landfills, and cuts down on the need to use a leaf blower.
You simply use a lawn mower with a mulch feature and mow over the leaves, just like mowing the grass. It can take a few passes depending on how many leaves you have. If you have especially deep leaves you may need to distribute them after mulching with a rake, or by using the bag feature on the mower for the ability to empty and distribute them evenly into other areas of the yard.
 How much is too much mulch?
Distribute mulched leaves evenly, as to not suffocate your lawn. You should still see grass blades sticking through, not just a thick carpet of dried leaf pieces.
Yes! The garden and flower beds are great places to distribute extra leaf mulch. It helps insulate and block weeds there too.
Mulching or bagging are the recommended options. Piles of leaves can suffocate the lawn. They also tend to get soggy and moldy too. When Spring rolls around you’re likely to uncover a very sad lawn situation.

So there you have it. Mulch the leaves and spend the time you save drinking pumpkin spice lattes in your autumn wonderland!

Ingredients:
Directions:
Not a pumpkin/cheesecake fan? Click the link –> CRISPY CARAMEL APPLE PIE to see our delicious apple pie with crumble topping recipe!
“Thanksgiving Sandwich Style” Using: Toast, Turkey, Stuffing, Cranberry, Mayonnaise, Gravy
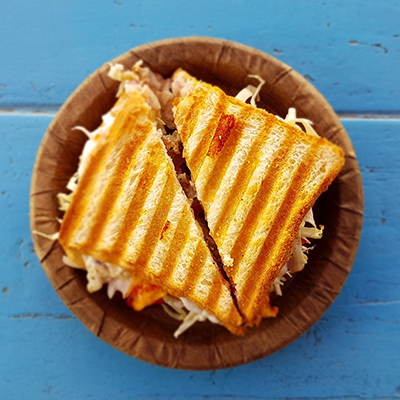
Make it: This one is our favorite. Select a bread that toasts well, like small ciabatta loaves or Texas-style slices. Spread mayonnaise on one side of the bread. On the other side of the bread, spread cranberry sauce. Layer in leftover turkey, and top with stuffing. Toast in oven, panini press, or pan. Serve with a small side of gravy for dipping or topping.
Pro Tip: If using a pan to toast a sliced bread sandwich, use a minimal spread of mayonnaise on the outside of the sandwich instead of butter. It spreads evenly so easily and toasts the bread perfectly!
“Turkey Salad Style” Using: Turkey, Mayonnaise, Celery, Honey, Red Grapes

Make it: This is a sweet turkey salad. Cube or loosely shred leftover turkey. Half red grapes and dice celery. Combine everything with light mayonnaise. Add in honey, salt, and pepper to taste. Gently mix in the red grape halves. Garnish with a small dash of poppy seeds and/or dried minced onions, if desired. Serve with crackers, on a bed of lettuce, or make into sandwiches.
“Turkey Taco Style” Using: Turkey, cheese, toppings…

Make it: Shred or slice leftover turkey into small strips and cook with taco seasoning packet. Make tacos or nachos!
“Burst Pasta Style” Using: Linguini, Cherry Tomatoes, Vegetables, Broth, Parmesan

Make it: Cook fresh linguini (or boxed pasta if preferred), reserve the pasta water after cooking. At the same time, in a separate pan, heat a tablespoon of olive oil with a few cloves of fresh minced garlic until fragrant, about 1 minute. Add a 1/2 pint of halved cherrie tomatoes, cook for additional minute. Add 1/2 cup of chicken broth, OR reserved pasta water if you don’t have broth. Cook tomatoes until “burst,” which looks wilted. You can stop there, or add in other leftover veggies like kale, spinach, mushrooms, etc. Add bite-sized pieces of leftover turkey heat until the turkey is properly reheated. Add in some reserved pasta water as desired to loosen mixture. Salt and pepper to taste. Toss cooked pasta in with the mixture and a pad of butter. Top with parmesan.
Pro Tip: Mix in a tablespoon or two of cream cheese in the liquid of the cooked vegetable mixture to make it a creamier sauce.
“Skewers Style” Using: Turkey, Vegetables
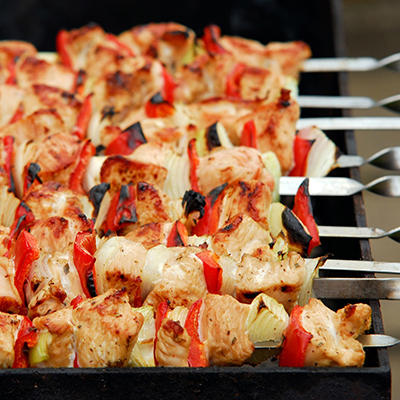
Make it: Compose skewers with chunks of leftover turkey and vegetables. Most vegetables work; cherry tomatoes, mushrooms, onions, peppers, zucchini, potatoes, and carrots, all work and are often plentiful leftovers on relish trays. Roast skewers in oven or on grill for a few minutes. Serve plain skewers with gravy on the side for dipping OR brush cooked skewers with Italian dressing for a different flavor profile.
“Soup Style” Using: Turkey, Vegetables, Broth
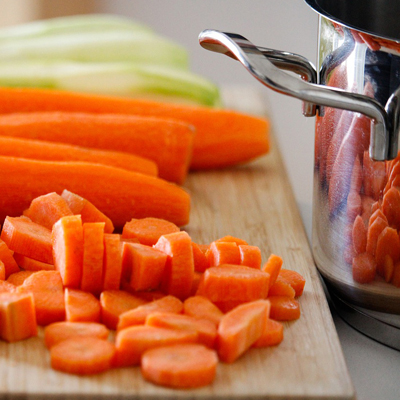
Make it: In a large pot heat 1 tablespoon of olive oil with a few cloves of fresh minced garlic. Heat until fragrant, about 1 minute. Add in a few cups of broth (make your own if you like) and vegetables. We like carrots, celery, diced onions, potatoes, and shredded turkey. Season to taste with salt, pepper, and a few sprigs of leftover spices from the stuffing like fresh thyme and/or rosemary sprigs. Cook on med-low until cooked through. Remove thyme and rosemary sprigs and serve.
“Turkey Cowboy Skillet Style” Using: Turkey, Carrots, Peas, Mushrooms, Gravy, Canned Biscuits, Cream of Mushroom Soup

Make it: Heat a drizzle of olive oil in pan with some fresh minced garlic until fragrant, about one minute. If using raw onions and carrots; chop, add, and cook until softened. Add shredded turkey, peas, mushroom, even green beans, and cook until warmed up. Mix in gravy (OR cream of mushroom soup), adding small amounts of leftover broth or water to loosen the mixture. Season with salt, pepper, and leftover fresh spices like thyme or rosemary to taste. Transfer mixture to an oven-save dish. Top mixture with biscuits, keeping the biscuits away from the edge of the dish. Cook in oven until biscuits are golden. Brush melted butter (or melted butter with minced garlic if you prefer) over the biscuits and serve in bowls.
The best part of being “home” is spending time with our beloved pets! That’s why we’re sharing all of our favorite pet finds in this month’s Home Hack. We found most of our favorite items were available on Amazon, so we will share those pics with their stars rating below.
If you have big dogs like us, you know it’s hard finding toys that stand up to their level of play. These are our hearty favorites, and they’re bacon scented!

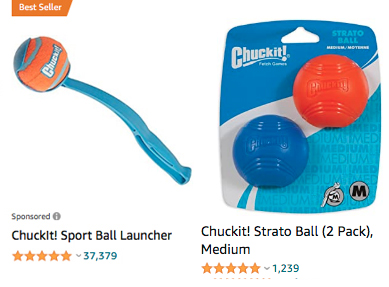
These balls are great for medium sized dogs, and the ball launcher has a variety of ball sizes available for a variety of dog sizes.
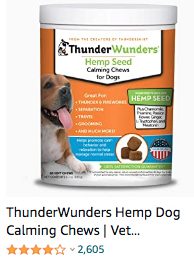
For dogs with storm sensitivities or other anxieties (like fireworks), these chews have been a miracle!
An honorable mention for calming vests. Ideal for the less anxious, but occasionally nervous dogs.

This shampoo by Jax-N-Daisy (jaxndaisy.com) keeps our pups fresh and itch-free.

Memory foam beds for dogs support their spine and joints just like it does for people. Don’t they look comfy?!

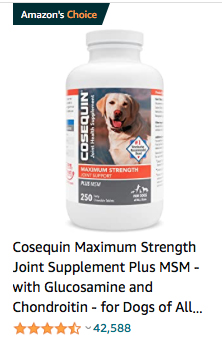
Speaking of support, we’ve used this joint supplement for years.
This litter is hands down, the BEST litter we have ever used. Low dust and no smell, you can’t ask for more!

A Litter Genie is a MUST for cat owners. It might not seem worth it, but it makes clean up and disposal so easy. You’ll thank us later!

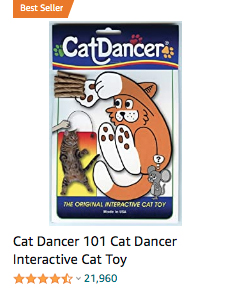
This little toy is so simple it looks like nothing, but cats absolutely love them!
Celebrate your pet and decorate your home at the same time with a pet portrait! We found several affordable shops online that make paintings and decor with a simple photo of your pet. For example, “MonicaACreates” is a shop we found on Etsy through a quick search, who is right here in Central Florida. What a great gift idea too!

Or get a minimalist locket, from “BijounBoutique” (also on Etsy) that holds a photo of your pet inside a little gem! You can look in, use your phone camera, or phone flashlight to reveal the image. Comes in necklaces and keychains. Also makes a great gift!

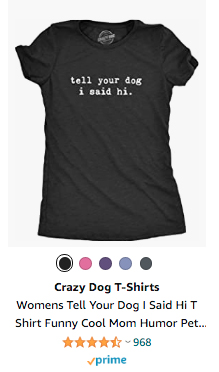
… and be sure to tell your dog we said “hi!”
