All editions of the D&CO. News Post are delivered directly to your email inbox. It’s informative, fun, and free! Don’t miss out, sign up today!
“What is it?” D&CO. News Post is our reoccurring newsletter, sent directly to your email inbox. Think of it as a tiny magazine celebrating home ownership, from the perspective of your favorite mortgage advisors! Every issue of the D&CO. News Post features all of the D&CO. home fun with DIY, how-to, reviews, tips, design trends… even signature recipes from our D&CO. treat bags! We’ve also got industry news, loan advice and tips for you too.
A note about password “protected” articles: Sorry, those are articles to be released in the next issue of the D&CO. News Post. See them asap by signing up for our email list. Just scroll down to see the current month’s and past News Post articles.
Pack your bags and hit the road – but not before you check out our best summer travel tips.
OUR NUMBER ONE VACATION TIP: Don’t post any details about it on social media!
Resist the urge to advertise you are going on vacation or that you are actively on vacation on social media. Posting things about every detail of your vacation; when you’ll be leaving, how long you will be gone, where you’re going to, how far away you are; are all advertisements that your house is currently unoccupied and will be for sometime. Give the details to your close friends and family, but save all of your social media-worthy pics and posts for when you are back home. (Ask your family members to do the same.)
Package collection: Pause the Amazon and/or subscription orders, and mail to assure packages won’t be arriving while you are gone. If you have a trustworthy neighbor/friend ask them to keep an eye out for any suspicious activity, and/or to pick up deliveries/mail that fall through the cracks while you’re away.
Vacation with peace of mind: Stay connected to home while you’re away. There are so many ways to monitor what is happening back home while you are on vacation, which is helpful if you are a vacation worrier. Now days you can *know* everything is a-o-k at home with technology.
Ring doorbells
App controlled doors/locks
Smart thermostats
Alexa lighting
Pet cameras to check in with your furry family/sitters
Try using simple timers for things like lights and watering to keep things looking lived-in and cared-for while you’re away.
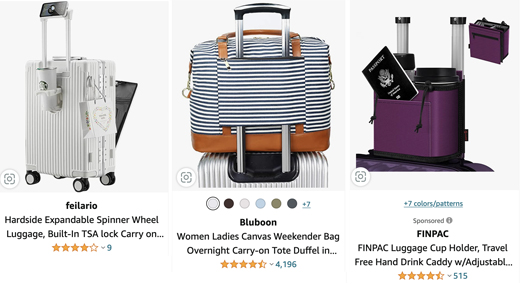
If you can, pack only carry-ons: If you have ever “lost” your luggage traveling, you’ll never leave your belongings to chance again. The truth is, we rarely need everything we pack – think about your vacation habits; are you in a swimsuit for the majority of the time? Do you do your hair and makeup every day? Do you rewear items or buy tourist t-shirts as soon as you land? For the length of a 4-5 night stay, my husband and I travel more-often-than-not with ONE rolling carry-on luggage that we share, and 1 personal bag each (like a bag that fits on the luggage, or a backpack). It’s so nice to not waste time waiting for luggage that may never arrive or be delayed in weather. We are in 100% vacation mode the moment they open the cabin doors at our destination.
Convenience can make travel easier, consider investing in a quality all-in-one carry on suitcase or accessories that make luggage management easier.
Organizing is key: Think of the things you are always missing on the other side. Aquire them during travel or bring them with you. Some of the must-haves for us are:
plane/car snacks – jerky, crackers, protein bars…
earbuds
a trash bag for separating dirty clothes
something chocolate – we get Riesen chocolate caramels!
a water bottle
hand sanitizer
hair conditioner
razor, toothbrush, toothpaste
apps for entertainment – Music, Audible, Netflix, Disney+; download your in-flight content so you can access it when your phone is in airplane mode.
packing cubes for organizing clothes, and washable/reusable pouches for snacks and accoutrements.
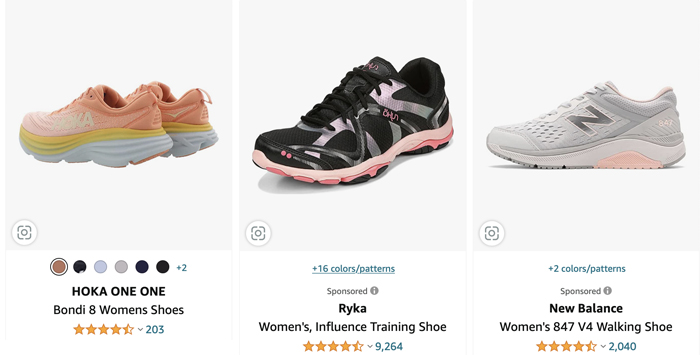
Good walking shoes: Most people walk more on vacation than in their daily life. Keep those feet happy with good shoes. (Break them in by wearing them a few times before vacaymode is engaged.)
Nervous flyer or light sleeper? Listen to Audible, music, or movies through a fancy sleep mask to distract you from the flying. They also work great to block light and noise out while you sleep.
Traveling with Pets? Check out our pet vacation tips article at the link.
STAYING SAFE
Safety first: Make sure you are staying aware of your surroundings. Consider a traveller’s wallet for your cards and ID. Also, try using Apple Pay on your iphone, it’s a more secure transaction than handing your credit card and info over to strangers.
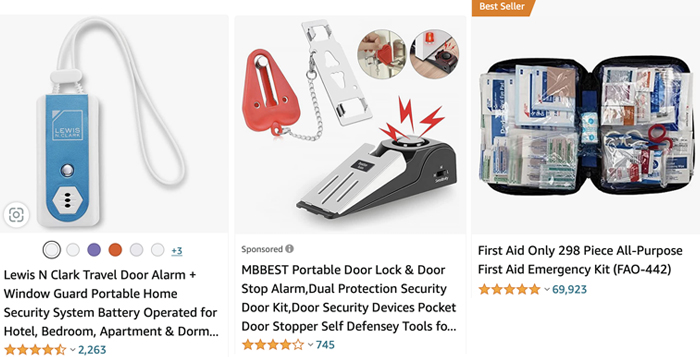
There are even security measures for inside your hotel room, like universal door locks and alarms.
If you’re traveling by car, camping, or traveling with a large group, consider a travel first-aid kit.
ABOUT YOUR DESTINATION
Start planning for fun early: Before we even think about packing our bags, we love using YouTube to find vloggers sharing their travel recommendations for popular vacation destinations. Just search for terms like “<your destination location> travel tips” or “… restaurants,” etc. We have found so many hidden gems this way; shopping, specialty food markets, tourist attractions, discounts, places to stay, landmarks to visit, restaurants, and more. It gets everyone excited for the trip, and gives you options when you’re faced with the dreaded:
Me: “What do you want to do today?”
Them: “I dunno… what do YOU want to do?”
Me: “I dunno.” *stares at TV for 30 minutes*
Look for discounts:
We download the Groupon app specifically for vacation. We’ve gotten discounted tickets for trolley tours, attractions, museums, meals, and more just by just checking for specific businesses on Groupon first.
Pick up those colorful maps! You know the ones, they look like a cartoon drawing of the tourist spot, but often have coupons and ideas of other fun vacation things to do. They are also helpful for navigating the town.
Call ahead and ask. If you have a large family or group, you might qualify for a group discount. Call ahead and ask.
LOOK UP REVIEWS: We have been burned by too many good presentations to ever book a tourist outing again by their word during a resort “free breakfast presentation.” Find the company on Google or Yelp and read the recent reviews before booking an excursion. Reviews are available for hotels, resorts, excursions, attractions, restaurants, shopping districts, and more. It’s worth five minutes to see what’s up.
Ask a local: We like to ask the front desk/concierge for their favorite places to eat or visit in the area. They are locals, they know the town best.
Try an Uber: It’s a little more regulated than taxi’s in that you will know the price before you get a ride. We’ve had one-too-many surprisingly expensive cab fares when navigating a town using taxis alone.
These are the HEALTHIEST fries you will ever eat! Made exclusively in an air fryer, these healthier “steak fries” will satisfy cravings, and the health factor will go unnoticed by picky eaters.
Note: If you have a fry mandolin, or a waffle cutter, you can use it instead of hand cutting the potatoes. You can also hand cut them into traditional “fry” shapes, we just like cutting them into half-moons.
You can use this recipe to make breakfast home fries too, just dice the potato into 1/2″ pieces. 🙂
Ingredients:
Red Potatoes (1/2 of a potato makes a small but satisfying serving)
1 teaspoon of Olive Oil
Seasoning: Salt, Pepper, Garlic Powder, Onion Powder to taste.
Directions:
Wash potatoes and cut each potato in half.
Placing the flat (cut) side down, cut the potato into slices that are about 1/4″ thick. They will look like half-moons in shape. Place slices into a bowl for seasoning.
Crack several turns (think 20+) of pepper, minimal turns of the salt mill (1 to 2 turns). We also generously season with onion powder and garlic powder.
Pour 1 teaspoon of olive oil over the seasoned potatoes and mix with your hands to incorporate. If necessary, add olive oil sparingly, these fries are healthy and require little-to-no-oil thanks to the air fryer! The oil in this instance just serves as a teeny tiny means of getting the seasoning to stay on the potatoes.
Place potatoes in air fryer on “Air Fry.” (Our machine settings automate to 15 minutes on 390.)
Pause and carefully shake the air fryer drawer every 3 to 5 minutes to ensure all potatoes are browning evenly.
Monitor the potatoes until they have some browning, and are fully cooked. (Ours typically takes 10 to 15 minutes for 2 to 3 servings.)
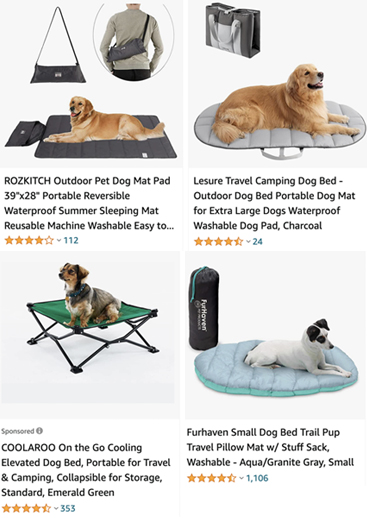
Some pets are happier at home with a loved one, while others are ready to be on whatever adventure you are on! If your travel buddy is your favorite furry friend, here are some pet products to make vacation life more comfortable for you both!
(We found these products on Amazon)
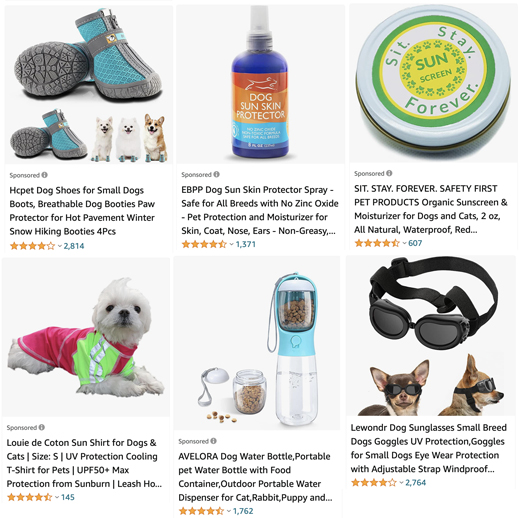
If you need it, they probably need it too: Just like people on vacation, our pets need hydration, sun protection, shade, snacks, and rest too. If you are at a destination where you have to wear sunglasses and sunscreen and seek shade; don’t forget to keep those fur babies hydrated, and keep their feet, noses, skin, and eyes protected too.
The nose, ears, and belly are often spots with exposed skin. Use a pet-safe sunscreen to keep your pets protected from those rays.
If the ground is too hot for our bare feet, it’s too hot for paws.
If the sun is too bright for our eyes, it’s too bright for theirs.
If it’s too hot outside for us, it’s too hot for them.
Decorative clothing may be cute, but it can make pets hot. Keep the costumes for cooler weather, swapping for sun-screen based pet clothing when necessary during those hot and sunny months.
Car safety and comfort: A simple seatbelt adapter and a pet friendly seat set up can keep our very good boys and girls calm and secure during car travel.
You and your lil buddy jet-setting? Give them a secure but roomy place to read their Sky Mall Magazine. (Okay, they don’t really read by it’s cute to imagine.)
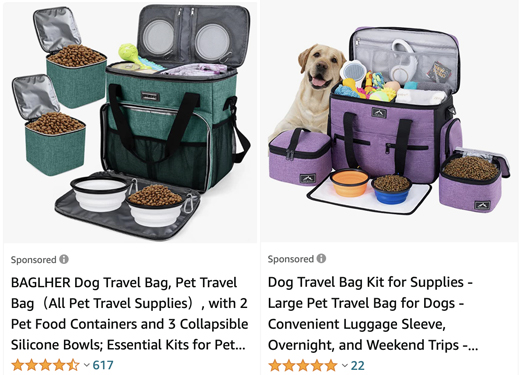
Pet luggage is a thing: Consider pet travel bags to make carting their food, water, toys, accessories, and eating station easy-peasy.
A place of their own: Get your pet a travel bed that they can use at home, so that when you move it to a vacation location, they have a familiar spot with their own scent, thus the comforts of home while away.
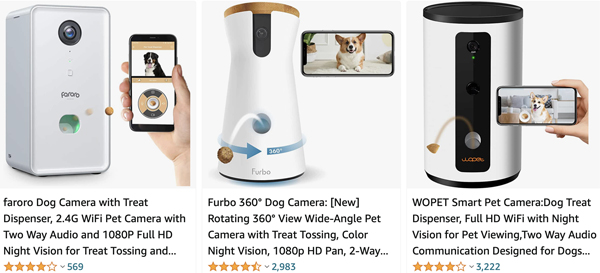
If the pets are at the rental while you’re out doing tourist stuff: New locations can be scary for pets. Check in on them with a device like a Furbo – a camera with speaker and treat dispensing capability. (This is also great for checking in on them while they are at home when you’re at work, or being watched by a loved one or sitter.)
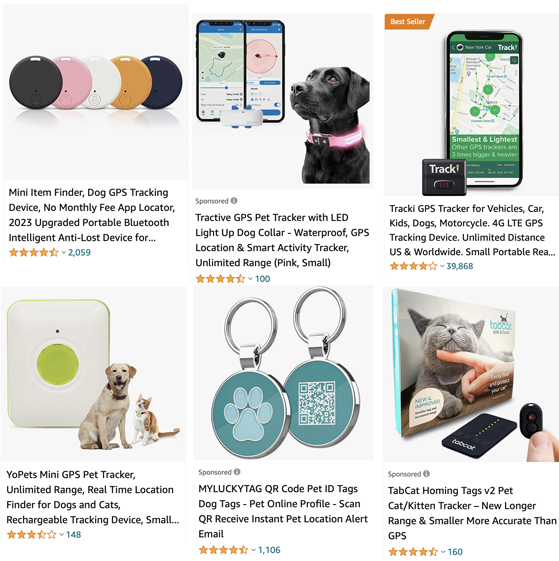
Keep track of our best buds on vacation: So many pets go missing on vacation. Make sure they have clear ID, and/or use a pet tracker to see where they may have wandered off to, or to just rest-easy that they are still safe and sound, probably passed out on the couch, at the rental.
Light up the night: These light-up collars and leashes can keep you both safe during a night walk in an unfamiliar place. It will be also easy to spot them roaming the fenced yard at night while you sip Piña Coladas from your lounge chair.
Pool, lake, or beach bound? Keep them safe with a simple life vest. (Don’t forget the sun protection for you both!)
Remember: VETS KNOW BEST!
These are products we’ve enjoyed and simple info we’ve learned over the years as pet owners. Always talk to your vet for the best advice and products for caring for your pets during travel and at home.
Now that you’re hopefully sleeping on the PERFECT mattress, if you still find yourself having restless nights, it could be due to a number of different things in your environment or on your mind. We’re here to share the things that help us sleep better in hopes that they help you to sleep better too!
WORRYING about <fill in the blank>:
Work, kids, chores, bills, schedules, even vacation can keep us up at night. The best thing that helps us get sleep when we are worried about a busy day(s) ahead is to get ready for bed, lay in bed and make a list of things we have to accomplish for the next day. This is especially helpful with deadlines or time-sensitive tasks. It even works with goals. We find when we make writing down the next-day’s tasks or goals a nightly habit, we go to bed calmer because everything is accounted for on the list.
This also works for sleeping the night before a trip. Simply make a list of everything you need to remember for the morning and see if you’re more successful catching some peaceful pre-vacation ZZZ’s.
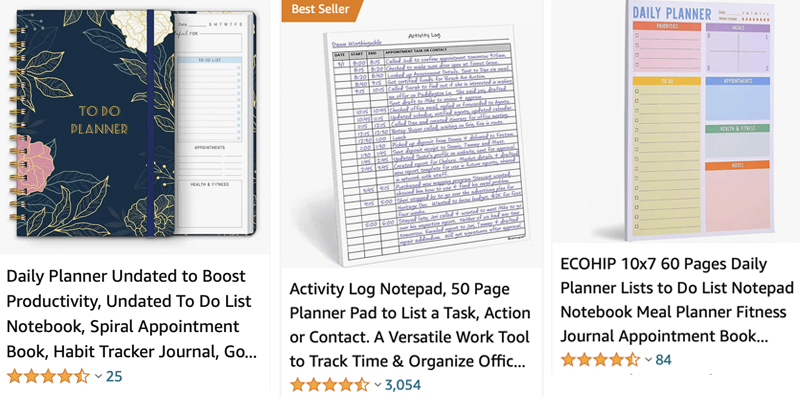
Try keeping a pen and journal or task sheet near the bed for easy list/schedule making:
Example items for this article were all found on Amazon.
Anxiety:
When feeling anxious, happy-natured books on Audible helps to take our minds off of the hamster wheel and into sleep mode. Funny celebrity autobiographies, self-help, business topics, hobbies, even whimsical stories from our youth take us away to a not-so-scary place in our imagination. (Audible is basically a modern day Books-on-Tape, and is an Amazon product.)
There’s even a series of meditations on Audible specifically for sleep. I was doubtful anything like that would be all that effective, but I fall asleep EVERY. TIME. In fact, I’ve never made it to the end of the meditation awake, so I have no idea what happens. 😂 The same is true for everyone I’ve suggested them to.
Bonus: the Audible app also has a sleep timer, so it won’t keep you up all night.
TV Shows We’ve Already Watched:
If The Office is on when I am going to bed, I’m probably going to watch it. Despite the fact that I have seen every episode of that series a million times. Whatever the show or movie, there’s something about being entertained but not having to concentrate on the story that gives a sense of calm before bedtime.
Timer Your TV:
Most modern TV’s have a sleep mode option in the menu. Set it for an hour or so so that it turns off after you fall alseep and doesn’t wake you up during the night.
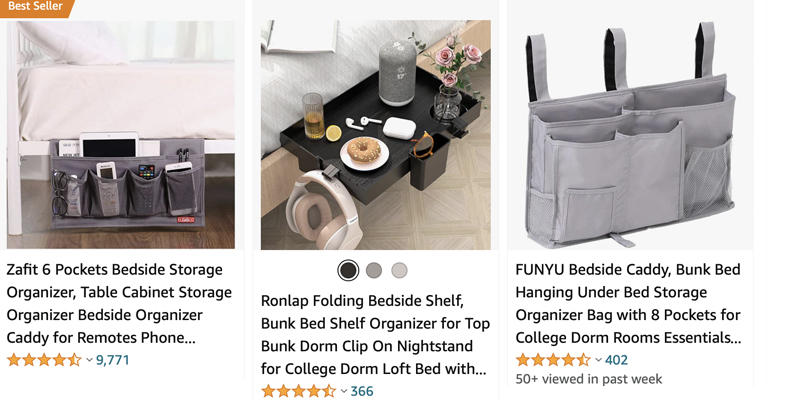
Put Away Electronics:
No more jumping down the rabbit holes of everything on the internet and social media before bedtime. Give yourself a cut-off time for looking at electronics. The blue light keeps our brains awake, so an hour before your normal bedtime is a good time to put them away. Store those devices in a drawer or a mattress cubby like these:
Shower or Bath:
There’s something about being clean and fresh before bed. Especially if it’s been a long day, or a day out doors.
Even though it’s Johnson’s – a LOT of adults swear by the Bedtime lavender bath for its calming effects and help with stress headaches.
A Cold Gel Pack:
If I’m stressed out or otherwise not feeling 100%, I like to put a cool gel pack on my pillow behind my neck. I use a first aid refrigerator type gel compress that is in the cloth barrier, and then I cover that pack in a tea towel. It should just be cool, not very cold or freezing. Nothing cold or frozen should be in direct contact with your skin, so a good cloth barrier is an absolute must.
Adjustable Bed Frames:
An adjustable bed frame helps you achieve the perfect sleep position. Ones with the light massage feature, can further help lull individuals back to sleep on restless nights. We talked about these in our recent mattress article, but it’s helped us with sleep so much it’s worth re-mentioning here!
Dark and Cozy:
Black-out curtains, a traditional sleep mask, or an upgraded version with built-in headphones help block out slumber stealing light. The latter are especially helpful if you like hearing music, Audible, or tv while you fall asleep. Keep the volume low and sleep the night away.
Time the Caffeine:
If you are unknowingly sensitive to caffeine, things like coffee, tea, SODA, even chocolate could be keeping you awake when you partake late in the day. I will sleep better cutting these things off 3 hours before bed, while my husband has to avoid caffeine after 2pm. See if you notice a difference by monitoring your caffeine intake hours.
Skip the Late Night Snacks:
Late night digestion can be another sleep-stealing culprit, because the process can keep our body awake, or wake us up needing to use the bathroom. We found cutting meals, drinks, and snacks off at least two hours before bed did the trick.
Talk to Your Doctor:
A friend of ours had a horrible time sleeping, so they talked to their doctor and were prescribed a sleep study. This type of study involved sleeping in a hotel-like room over night while they were monitored through stick-on nodes. Turns out, they had sleep apnea and finally found restful sleep after getting a CPAP machine. We’ve heard sleep studies can be done at home too – talk to your doctor about options.
Do you have a tip for sleeping better? Share it on our Facebook or Instagram posts about this subject @DeAnnaAndCompany
🌽 CORN is made even more delicious on the GRILL! Here’s how to make it!
Ingredients:
6+ Ears of Fresh Corn
Water
Salt (for brining and then to taste)
Butter (to taste)
Toppings – try Trader Joe’s seasonings like; “Everything but the Bagel,” “Everything but the Elote,” or “Chili Lime;” use the seasonings on their own or use butter or mayo with cojito cheese to make it like authentic street corn, “Elote.” (optional)
Directions :
6 to 24 hours in advance: shuck and wash corn.
Place clean corn cobs in a pot or container big enough to submerge the corn in water – I use a XL Rubbermaid drink pitcher with a lid.
Fill the container with water and salt with a moderate amount of freshly cracked salt. (About 15 turns.)
Let corn sit in the salty water for several hours, ideally over night.
Pre-heat grill for 10 minutes then reduce heat to medium-low.
Pat corn dry and place the raw corn on the grill. Grill for 15-20 minutes turning every 7 minutes. (Cook time will vary on grills, corn kernels will be bright yellow, and easily pierceable and juicy when fully cooked. Like the picture above.)
Don’t let the burn marks fool you – they won’t taste burnt at all. It’s like some kind of CORN MAGIC!
Butter, add toppings or salt, and enjoy!
👉 Don’t like eating corn on the cob? Turn your grilled corn into dish:
Carefully cut the kernels from the cobs and place in a large serving dish. Mix with a few pads of butter until melted. Add 1 can of Rotel to create a smokey-zippy corn side dish that goes great with barbecue.
Grilling season is upon us, so we’re here to share all of the grill products, tips, and accessories we LOVE!
NOTE: ZERO of the items show in this article are sponsored or ads from us. We buy things with our own money and simply loved the results enough to share. Most of the examples below were found on Amazon.
The BEST Grill Sauces:
BBQ:
Hands down, the most crowd pleasing barbecue sauce? ANY style of Sweet Baby Rays. We prefer the original or honey flavors. It’s just dang tasty! If you’re a bbq mustard person, Sonny’s sells bottles of their sauces in the restaurant – and their Carolina style mustard is a great one (so is their sweet bbq sauce).
Hibachi:
We find the Kikkoman brand has a nice tasting *thick* teriyaki sauce; however our FAVORITE version is a thinner “Island Soyaki” from Trader Joe’s. It even has the sesame seeds in it! It makes noodles, veggies, and fried rice taste just like your favorite Hibachi restaurant. Publix also has a thin teriyaki sauce (Publix brand) that we use in a pinch. Terry Ho’s Yum Yum Sauce (we buy it at Publix) is the closest we’ve found to restaurant-style white sauce. If you’re a ginger sauce person, Makoto makes great restaurant matches too – find it in the Publix (and Walmart) produce section by the refrigerated dressings.
THE SECRET to the MOST DELICIOUS Grilled Chicken and Corn:
BRINE IT. That’s right, a long soak in salty water does wonders for chicken breast, and fresh corn on the cob. See our recipe of the month for cooking corn on the grill!
Safe to Eat:
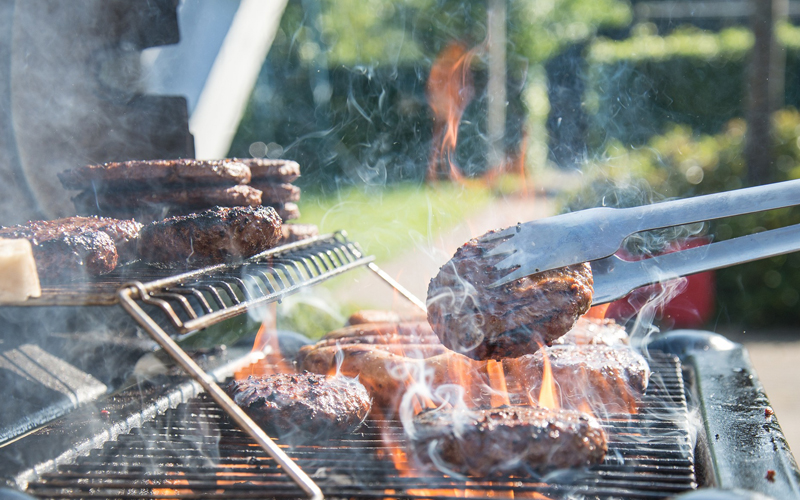
The easiest way to tell when things are done cooking? A good thermometer! No more squishing all of the delicious juices out of your burgers or chicken. You’ll know when dinner’s ready by temperature alone.
Precision Grilling:
Use a temperature gun to find the exact temperature of your grill. These are especially useful for low and slow barbecuing or making pizzas on the grill.
Charcoal Chimneys:
If you are grilling with charcoal, a starter chimney is a MUST! It gets the coals to grilling temperatures quicker so you can have those hot dogs ready ASAP!
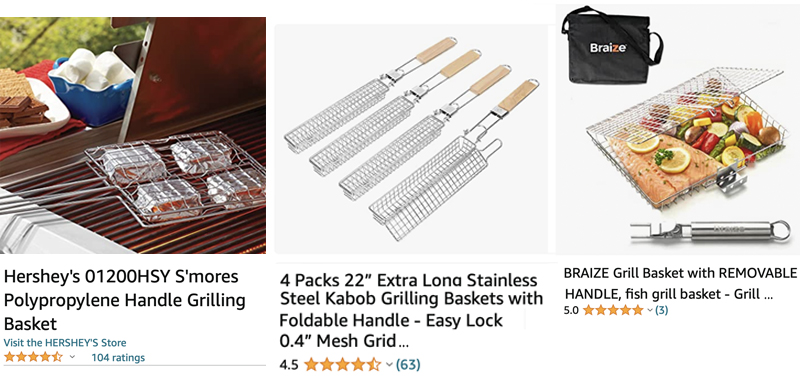
Grilling Baskets:
These little baskets are wonderful for cooking stick-to-the-grill things, like shish-kebabs, veggies, or fish; but also S’MORES, toasted sandwiches, or little pie turnovers. Yes please! 😋
Cast Iron Grill Forms:
Similar to baskets, use these little cast iron forms to enclose sandwiches; like ham and cheese or “grilled” cheese; make pie turnovers with crescent rolls and canned pie filling; omelets and more! Basically any ooey-gooey thing you want to cook on a grill or campfire works great in these. (We love these for the fire pit!)
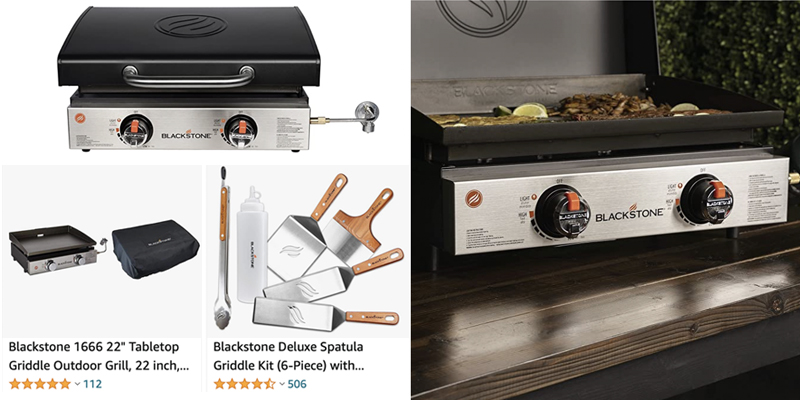
GRIDDLES:
Blackstone – is an AWESOME grill accessory or alternative that you can use to make all of the typical grill stuff, BUT ALSO hibachi style noodles or fried rice, hot cakes, fish, veg; it’s so versatile!
The best part is the 22″ (fits about 12 burgers) it’s small enough to be portable, so you can take it camping, on vacation, or even use after those post-storm power outages. WE LOVE OURS! You can buy direct or on Amazon, as shown below.
HIBACHI STYLE Pro Tip: Cold day-old noodles and rice make for the best hibachi-style noodles and fried rice on the griddle. Cook (boil) the plain rice and noodles you plan to use the night before and store it in air tight containers in the fridge until it’s hibachi time!
Easier Clean-Up:
Reynold’s Wrap NON-STICK Aluminum Foil is a DREAM! We use it in the oven and on the grill and the food just slides off! Look for this box that says “NONSTICK”:
Dawn’s Power Wash Spray makes tough scrubs SO EASY! Not just for inside dishes, but getting all the baked on goo off of grill baskets or pans too! You just spray it on and let it sit a few minutes, the little micro bubbles break down all the gunk and then it’s super easy to wash. Bonus, the “apple” scented one smells like a big ol’ basket of Granny Smith apples! 🍏
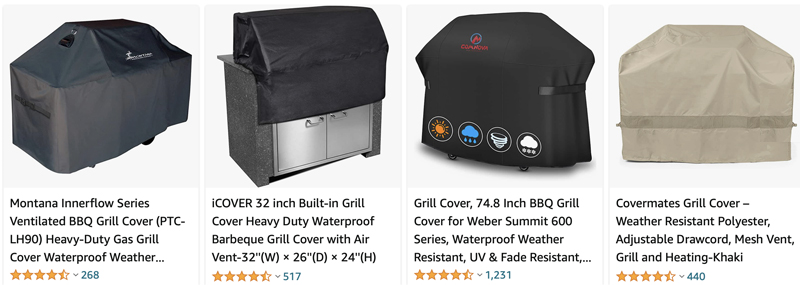
Make the Grill Last:
We noticed a marked difference in how long our grill lasts when it is covered, vs. the ones we thought would be okay because it’s stored under the shade and protection of a roof. Our 5-year-old grill still looks relatively new, and we think that is all thanks to using a weather proof cover that is vented. We usually cover it the morning after we’ve used the grill, to make sure everything is cooled down.
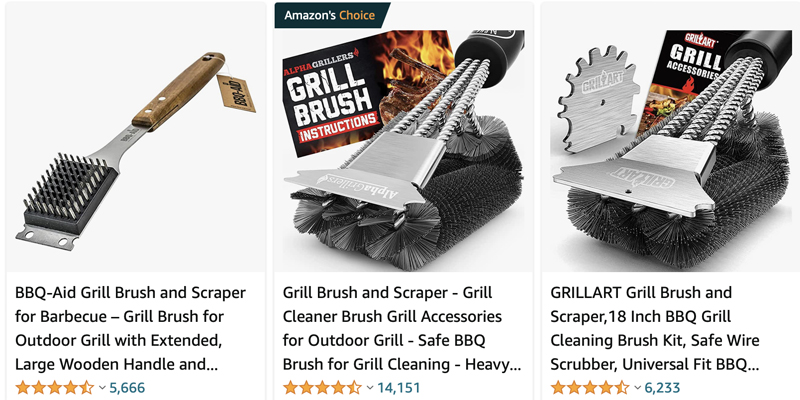
We find this type of brush/scraper cleans the gunk off the easiest.
Do you have a favorite grill accessory? Favorite type of grill? Share all of your product recommendations and grill tips with us on Instagram or Facebook @DeAnnaAndCompany
If you are a restless sleeper or someone who wakes up in pain after a long rest, we believe it could be because of the mattress. It’s time to consider investing in a quality mattress over a quick fix. While this means you may spend a little more money, the higher quality mattress should last longer and provide a higher quality of comfort. Since sleep is a part of staying healthy, we take our sleeping seriously around here! 😁 These are our opinions and recommendations based on our own experiences with these mattress styles and brands.
Mattress shopping can be AWFUL! We have never been able to pick the right mattress by laying on it for 30 seconds in a store. However we did a lot of EXPENSIVE trial and error, then a bunch of research; asked our families and friends… and finally found mattresses we absolutely LOVE. Now we’re sharing that information with you in the hope you will find one you love too!
MATTRESS TYPES
There are so many mattresses to choose from, but we stay stick with the three types below to assure you are getting a quality mattress. Before you start shopping, be sure to know how you (and your partner) like sleeping. Assess your sleep habits:
Do you like sleeping on super soft surfaces?
Do you find yourself over heating?
Do you snore?
Do you have neck or back pain in your awake life?
Do you have neck or back pain in your sleep life?
Do you prop yourself up with a lot of pillows?
Do you like laying as flat as a board?
Do you have restless legs?
Do your sleep habit answers differ from your partner’s?
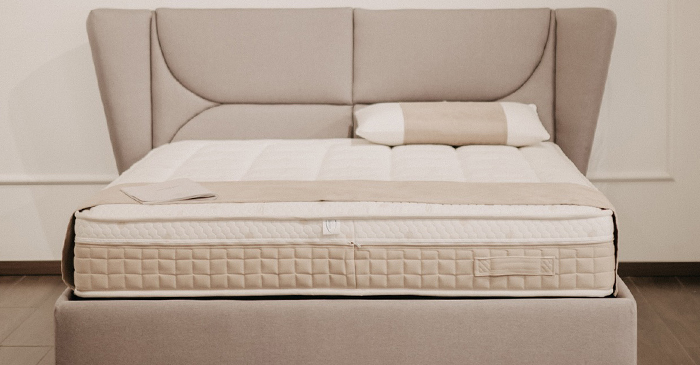
Pillow Top: A thick billowy pad on top of the mattress makes it like sleeping on a cloud for some people, while others say this softness is the cause of waking up in pain. Make sure you are not the latter before you buy.
Who it’s best for:
People who sleep easily anywhere
If you find hammocks comfortable to sleep in for long periods of time
If you do not like sleeping on firm mattresses
Memory Foam: The original LUXURY mattress. They call it memory foam because it contours to your body, and then springs back to it’s regular mattress form, like it “remembers.”
Who it’s best for:
People with neck or back issues
People who don’t like traditional or pillow top mattresses
Restless sleepers
Gel: Similar to a memory foam in that it contours to your body, gel is the modern twist; it’s all the contour, with more support, and less stuffiness.
Who it’s best for:
People who get hot when they sleep
People who don’t like memory foam, pillow tops, or traditional mattresses
People with back or neck issues
Restless sleepers
Memory Foam with Gel (We’ve seen it advertised as “Aerated Latex” and “Polymer”): It combines both a gel and a memory foam for the best of both worlds!
Who it’s best for:
People who get hot when they sleep
People with neck or back issues
People who don’t like traditional or pillow top mattresses
Restless sleepers
THE MATTRESSES WE BOUGHT
(AND LOVE!)
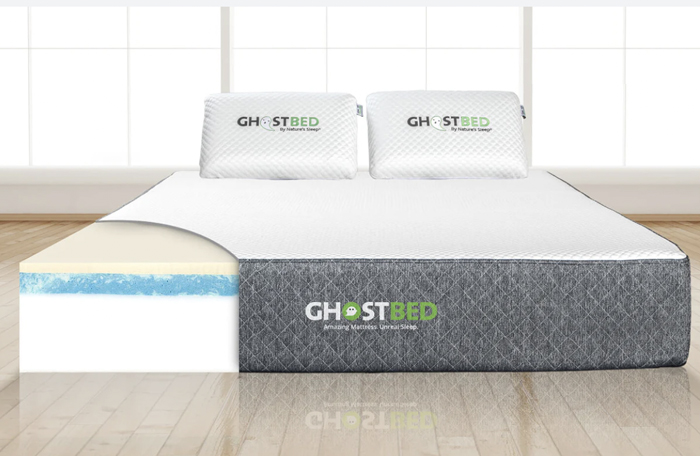
Ghost Bed
Why we love it:
“This mattress is a combination of gel and modern memory foam. It keeps me cooler than our Temperpedic bed did, without sacrificing the comfort of memory foam. This mattress is an absolute dream and I love it!”
AWESOME PILLOW ALERT: We also got the Ghost Bed pillows and they are like sleeping on a perfectly contoured pile of our wishes and dreams. (Meaning, WE LOVE THEM!)
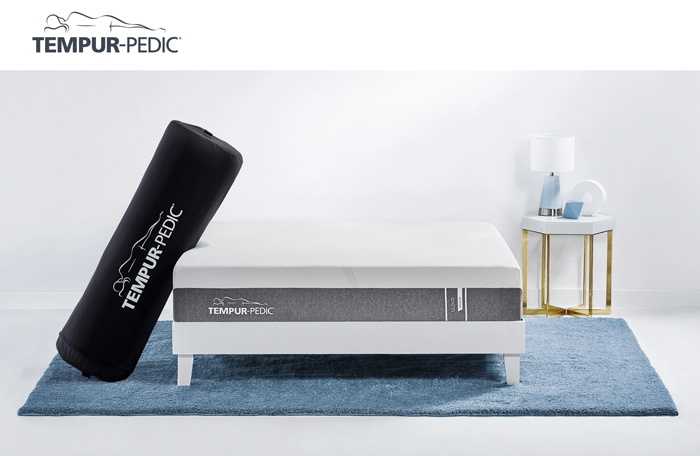
Tempur-Pedic
Why we love it:
“When my husband developed a pinched nerve in his shoulder/neck, this was the only mattress we could find that offered him comfort and the ability to finally sleep and get rest.”
“We bought a Tempur-Pedic mattress for our guest bedroom, and everyone always asks what kind of mattress it is because of how comfortably they slept. We love it!”
AWESOME PILLOW ALERT: We also bought a Tempur-Pedic pillow. It is much smaller in size than we expected but it is still a great pillow. It’s less dense than our gel pillow, and much thinner than a bamboo pillow, but it is still a very comforting accessory. It is especially helpful for neck issues, and is a lot lighter than a gel pillow, which makes it great for travel too.
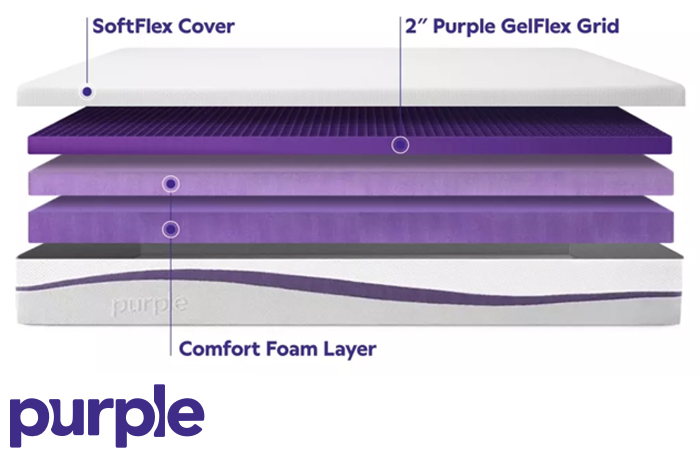
Purple Bed
Why we love it:
“This GelFlex grid bed is like a slightly firmer version of our memory foam bed, without being too firm. It’s firmer in that the gel does not sink down as much as a memory foam does. It contours around the body instead of sinking into it. It still contours to my body, and reacts like memory foam, but it a firmer way. It also keeps me cooler, since I tend to sleep on the warm side.”
AWESOME PILLOW ALERT: We also got the Purple Pillow, and it is so good for my husband’s neck issues. Note: This pillow is so dense it’s HEAVY. Not one you will easily throw around, but that is exactly why he loves it, it never moves in the night. It stays put!
ADJUSTABLE BEDS take comfort to the next level!
We cannot emphasize enough, how much we and our house guests LOVE our adjustable beds! A “split King” makes adjusting the bed for an individual’s comfort possible. Adjustable beds enable you to raise and lower the head and foot independently. They often come with extra features like a soothing vibration massage, USB ports, night lights, etc. The combination of our own mattress choice with our individual adjustable beds make our sleep so restful, we hate having to sleep in any other bed while on vacation.
“Zero Gravity” positioning for what is widely credited as the most comfortable sleep position.
Ideal for couples when purchased as a “Split King” because you can adjust to your individual comfort; mattresses are purchased as two separate “twin XL” beds and adjustable bed frames. The beds still fit right next to each other as if it were a whole mattress but allows for individuals to sleep in the position that is unique to them.
Great for snorers; you can adjust the head of the mattress to be slightly inclined to alleviate snoring.
Awesome for reading in bed, watching tv, or resting in a more upright position.
No need for box springs anymore!
Does not require a special mattress to use an adjustable bed frame.
Available with bells and whistles like a massage feature, USB ports, and/or led lighting.
Many come with a remote AND an app you can download to your phone so you can adjust it whether you lost the remote or ran out of batteries.
This pan-made dessert has flavor profiles similar to an eclair or Boston Creme Pie. It’s fluffy, and pudding filled, and just makes the perfect dessert for an Easter meal spread! Even better, it’s NO BAKE!
Ingredients:
Graham Crackers – 1 box original OR honey would work (NOT cinnamon)
Milk – 2 cups Whole Milk OR 1 and 3/4 cups Fat-Free Milk
Dark Chocolate Frosting – 16oz. – 1 tub
Cool Whip – 8oz. – 1 tub THAWED; simply store it in your fridge (not freezer) and it should be ready to use.
Directions:
Cover the bottom of a 9×13 pan with a single layer of graham crackers. You may need to break some sheets into smaller rectangles to fill in the entire pan base. This will be the “crust” that makes the dessert easier to serve, so be sure to fill the area in.
Prepare the puddling; NOTE: If using a fat-free milk, we leave out 1/4 c. of the (box instructed) milk to assure it will be a stiff pudding. 2% or whole milk does not require this step. Dump both flavors of pudding mix into a large bowl, whisk in the COLD-AS-POSSIBLE milk; we usually measure the milk out and put it back in the fridge until the second we need it. Use a spatula to scrape the walls of the bowl to make sure the mix is equally incorporated. Place pudding in fridge for 3 minutes.
After the pudding has chilled a few minutes, use a spatula to fold the THAWED Cool Whip into the pudding. Try not to overmix, but make sure it is well blended. The color should be evenly creamy, not striped.
Place half of the pudding mix on top of your graham crackers, spread evenly with a spatula.
Create another single layer of “crust” on top of the pudding with the graham crackers, breaking them into smaller rectangles to fill in all of the space.
Spread the remainder of the pudding mix on top of the second “crust” layer.
Place another single-layer of “crust” on top of the pudding later. Place the pan in fridge while you prepare the ganache topping.
Scoop frosting into a microwave safe bowl and microwave for about 25 seconds. Mix the frosting to assure there are no lumps. Pour onto the graham cracker layer and spread evenly. You will have to work quickly to get it spread evenly before it cools.
Cover and store the finished cake in the fridge for 12 to 24 hours. This time frame is important for the graham crackers to reach the right consistency and texture.


 These are the HEALTHIEST fries you will ever eat! Made exclusively in an air fryer, these healthier “steak fries” will satisfy cravings, and the health factor will go unnoticed by picky eaters.


 There’s something about being clean and fresh before bed. Especially if it’s been a long day, or a day out doors.