Wrapping gifts can be a real chore. Sometimes, it feels impossible to get your item wrapped in a way you are proud to present – but don’t give up yet, we’ve got some tips!
THE WRAPPING RULE:
IF IT’S A STRANGE SHAPE, IT GOES IN A BOX OR BAG.
Trust us. Odd shaped items, or items that do not have flat sides, will never wrap up in a way that gives you the satisfaction of a prim present. The simple trick? If the gift doesn’t have perfectly flat sides, put it in a box or bag.
“OKAY, WHAT SUPPLIES DO I BUY?”
Pro Tip: If you’re ordering things online, use the nicer shipping boxes to wrap gifts. Remove any labels/stickers and they’re ready to wrap!
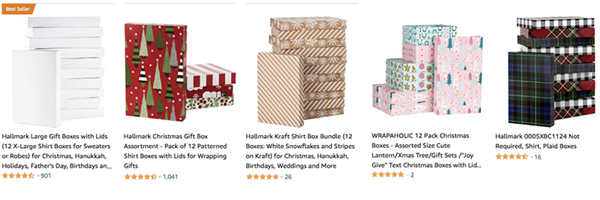
Shirt Boxes – they aren’t just for shirts. Shirt boxes come in value bundles and are perfect for smaller, flatter, oddly shaped, oddly or soft packaged, or several loose items. We searched “shirt boxes” on Amazon and found these cute options, just as an example.
 Gift Card Pillow Box Holders – double as simple jewelry boxes too
Gift Bags – You can get them in value packs too, plain colors, themed, etc.
Tissue Paper – You’ll need it if you’re using bags or shirt boxes. They sell it almost everywhere, even the dollar store.
Wrapping Paper – You can get all kinds of paper options at all kinds of price ranges. We suggest an average paper, ideally just pricey enough to have the grid lines on the back. The quality of paper is usually better (less accidental tearing) and the lines make it so much easier to cut straight.
Good Scissors – If you have an old pair that doesn’t cut right, it’s time to upgrade to a new pair. Does not have to be fancy, just has to function properly.
Clear Tape – Splurge and buy the brand name. You will save time and swear jar money. Pro Tip: the clearer the tape the less noticeable it will be. If it looks frosted on the roll, it will look frosted on the gift. Either way is fine, just a preference choice to make.
ACCESSORIZE with Gift Tags, Ribbons, and Bows. While they are not necessary, they make the experience even better for the receiver, taking your perfectly pretty present to the next level!
GIVE YOURSELF TIME TO WRAP
If possible, give yourself little blocks of time over the next few weeks to wrap things. If you are living that last-minute-cram-session lifestyle, gift bags and no-wrapping-required gift boxes will be your best friends!
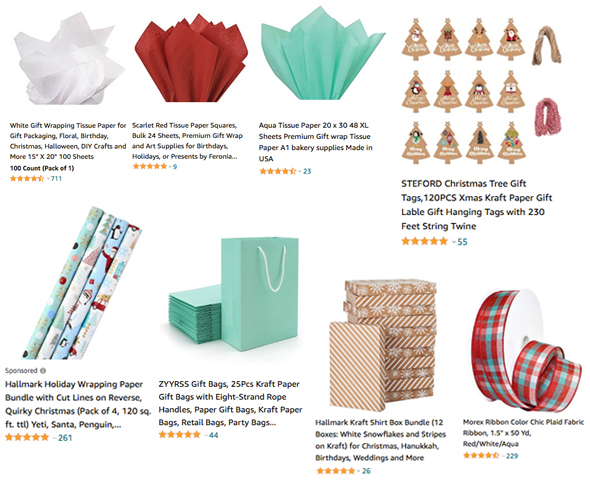
Now the fun part! Coordinate your wrapping selections, and voila! Your gifts become your holiday decor! Pick a few theme colors and only buy wrapping paper in those colors or that have those colors in them. Pro Tip: If your tree or holiday decorations have a dominant color, make sure that color is in your wrapping selections too.
Here’s an example of a theme we created using only items we could find on Amazon. For this example theme we wanted a homemade vibe in aqua, red, and white:
GIFT WRAPPING 101
(a how-to tip guide)
Paper Wrapping:
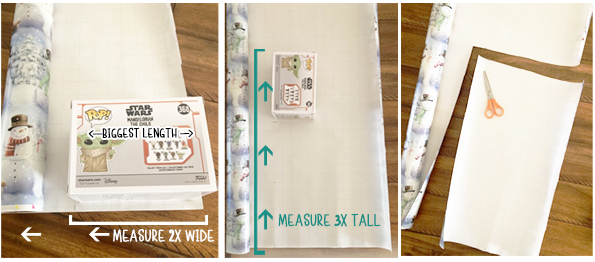
Measuring – Measuring can be tricky, but a good guide is to use the biggest length of your item to measure the paper at least 2 lengths wide, and 3 lengths tall. In general, it is better to err on the side of too large rather than too small. Pro Tip: Choosing paper with a grid on the back really comes in handy for measuring, cutting, and lining things up straight.
Wrapping – If possible, place top of item down so that your seams will be on the bottom of the gift. Even if your seam isn’t perfectly centered, it will be hidden on the bottom of the gift.
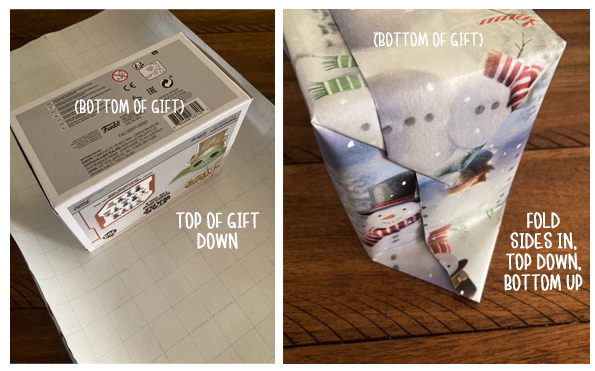
Folding – Fold ends in at the sides first, then down from top, and up from bottom to close.
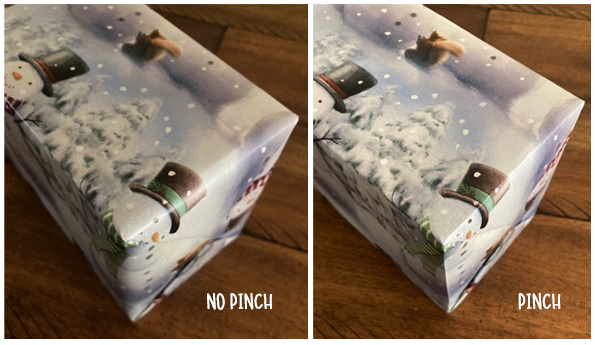
Pro Tip: On all box edges and corners, use your fingers to lightly pinch the paper into crisp creases. It really makes the presentation pop!
Gift Bags:
Pro Tip: Roll delicate or breakable items in tissue or kraft paper. Place a cushion of tissue paper in the bottom of the bag too. It’s also perfectly fine to place several wrapped or unwrapped items into one gift bag.
HOW TO: Use tissue paper to accent and coordinate the top of the bags for a pretty presentation. Place items in gift bag. Lay the stack of tissue paper out on a flat surface, pinch one sheet of paper in the middle and whip up into the air and down to form a fluffy cone. For most bags you will use at least 3 sheets of tissue for each bag top. Tuck the paper cones in top of gift bag, points facing down into the bag. Depending on your bag size, you may need to add additional sheets to fully obscure the gifts inside.
Boxes:
To wrap or not to wrap? If you used a no wrapping required shirt box you are basically done! All it needs is a tag, and some ribbon or a bow if you want to get fancy. If you used a plain and simple shirt box, if the item’s packaging is already a box, or you’re using shipping boxes, proceed to the “Paper Wrapping” section above!
Just remember, the wrapping is just for fun. The magic is in the giving.
You’ve got this!
HAPPY HOLIDAYS!