Curb Appeal

What to Expect When You’re… Resurfacing the Pool

If you own an in-ground pool, you’ll likely face the dreaded “pool resurfacing” at some point. Don’t worry, when you hire a reputable company, it’s not as bad as one would think! This process is necessary to keep your pool healthy, and also provides an opportunity to sneak in a few design updates. With a new water tint and a few new pool tiles, your dated pool can feel like a brand new paradise, potentially with minimal increase to the budget. (We’ll explain.)

To start, we recommend asking your neighbors and friends with pools for a good local pool resurfacing company recommendation. Google reviews are another place to find current customer feedback. Make sure the company you hire is licensed, insured, and experienced. Visit local pool tile stores for inspiration and recommendations. We got our natural-stone-pool-artist recommendation by visiting our local pool tile store. (The pool tile store didn’t sell natural stones or do that service, but they knew who did.)

pool water

Q: What can I expect when I have my pool resurfaced?

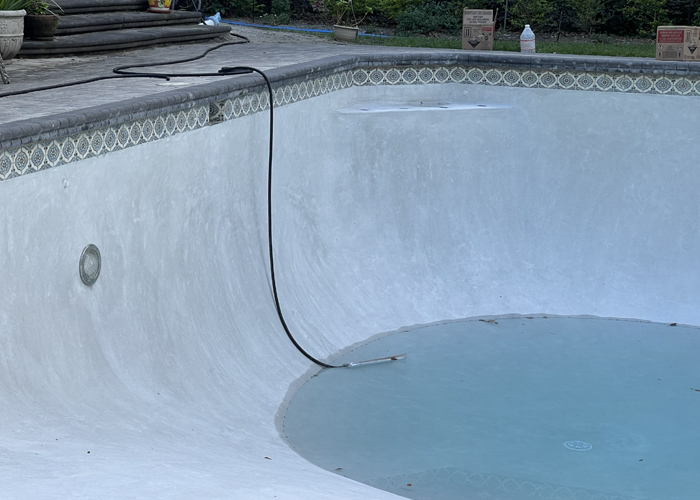
Your pool will be drained. It’s gonna get weird.

The pool will look strange for a bit. It will be sanded down in stages and then built back up. You’ll likely be surprised at how DEEP and SCARY it looks when it’s empty. There’s a lot of dust and the work can get noisy at times. A good contractor will keep things as tidy, safe, and as efficient as possible.

pool resurfacing

The resurfacing process is an average of 5 to 7 days.

Our pool is small (12,000 gallons) and it took 7 days. HOWEVER, we had significant upgrades to change the pool from plain plaster and 4×4″ tiles to large natural stones, which required a special pool stone artist and a bit more time to fit them together like a giant mosaic. If we had stuck with plain tile and plaster, it probably would have been completed in about 4 days.

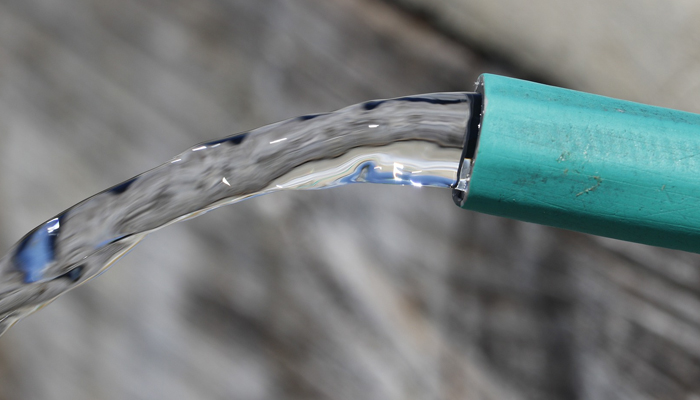
Filling the pool takes a while.

You’d think a full blast hose would fill it in no time, but pools are much larger than you think! This means don’t try and schedule your pool resurfacing and a pool party in the same week. Give it some breathing room.

filling a pool with garden hose


DYK? You can save money on the water used to refill the pool by contacting your water company.

Water companies typically have lower rates for filling a pool. You have to contact your provider before you pay the bill so your account can be adjusted; they basically charge you for the fresh water and take out the automatic sewage costs associated with the relevant gallon usage. The sewage waste cost is twice the price of the fresh water cost, so the savings is significant. Since this is a special rate, it can only be applied every so many months for special circumstances like this.

Pro-Tip: This special savings is usually applicable for the water usage caring for newly installed sod lawns too!

fill the pool with hose

Things can cost less if you plan ahead.

When you’re faced with a resurface, there’s a lot of opportunity to save money and time by getting things done now while the pool is stripped down instead of down the road. Save yourself the time and headache by getting pool problems addressed at the same time. Now is a great opportunity for:

  • Design updates like new tiles/ coloring

pool tile

Tired of the old, dated, or maybe clashing tile design? Now’s a great time to switch it out. Simple 4×4″ tile accent (edge) changes are usually the least expensive way to give the ol’ swimming hole a facelift above the water line.

  • Adding or changing railing, the tint of the pool water, etc.

Pro Tip: If you have an older pool, consider adding some design elements to the stairs, such as a tile accent edge, or even just a few 4×4″ tile diamonds to the step make stairs easier to see and judge for depth.

pool stairs

  • Fixes that need to be accomplished by emptying the pool; electrical, lighting issues, leaks, fixing pipes, etc.

Don’t wait to have a leak investigated or a light fixed. Seize the opportunity to get a specialist in there to fix things before it’s a beautifully renovated pool. At the very least, you’ll save the money it costs to refill the pool again should any of that work require a draining.

Pro Tip: Our resurfacing company offered a service to verify everything was in proper working condition. They checked for leaks, lighting issues, and mechanical function so that we could have any repairs done while the pool was stripped down.

pool fix

Don’t get stuck in the rutt of what-was.

We’ve seen many people treat a pool resurface like they treat house paint colors – they paint it whatever it originally was, never having considered if they could create something they like more. This is an opportunity to make an entirely new look! Just because the pool was plain and boring when you bought it, doesn’t mean you need to stick with that color palette. There are so many resurfacing color choices now days, you can really make any pool into a turquoise waters oasis. Create your own little paradise with new tile colors and colored aggregate plaster.

How do I get colored water, like the ocean?

ocean water colors

While this process costs a little more than a plain white plaster surface, it’s been worth the money in durability alone; it also achieved the exact ocean type color we wanted for our pool’s water. Tiny colored specks in the grit (“aggregate”) of the pool walls and floors, works just like the ocean floor; light passing through the water reflects the color of the pool (ocean) floor and walls. This grit is in the plaster that is the finishing coat of the resurfacing process. Our brand of aggregate plaster was called “Diamond Brite” and it gives the pool water its color, makes the pool less slick, and resists stains and deterioration from plant matter and pool chemicals.

Skilled technicians will know what specks of colors produce what color waters. Find an inspiration pool or water picture to communicate your desired color of water to the resurfacing company.

pool and deck

Be sure to check our social media posts about pool-resurfacing; we’re asking our community to share their best LOCAL recommendations for pool-related professionals including care and upkeep, resurfacing companies, maintenance specialists and more.

Share your LOCAL POOL SPECIALISTS recommendations in the comments on social too!

@DeAnnaAndCompany on Instagram and Facebook.


Home Hack

Spring Cleaning Checklist

We’ve got a 16-Days-to-Deep-Clean checklist to get your spring cleaning done with minimal pain. We’re also sharing our best tried-and-tested cleaning tools and supplies to make cleaning even easier. Do these tasks 16 days in a row, or spread them out over the month to keep you moving forward without getting burned out.

We’ve picked up a few cleaning tips that have helped us get through the dreaded deep clean.

  • Start at the top. Cleaning can sometimes get a little messy before it sparkles. Starting at the top of the room, ensures you’re not cleaning things twice.
  • Finish with floors. Mop, vacuum, or sweep your way out from one room to another.
  • Time the cleaners. Give cleaners enough time to do their job, but do not let things like toilet bowl and shower cleaners sit for longer than the bottle directs.
  • Throw away/ shred/ recycle papers you do not need. Of course, if it’s an important document file it. Shuffling random papers around just makes a bigger job to clean up down the road. Shred it and forget it. Old magazines that you have not cracked open in a year do not need to keep clogging up space in the home. Recycle them.

THE 16 DAYS TO DEEP CLEAN CHECKLIST:

☑️ Day 1 – DUST! Dust ceiling fans, vents, lamps, blinds, and finishing with floor boards. If it’s been a while since your last deep dusting, you may need to run a vacuum.

☑️ Day 2 – Wash blinds, slatted doors, and floor boards. We find the easiest way is to fill up a bucket of soap and water, gather a few shop rags and oddly, a paint brush (see pro tip below). We like Murphy’s Wood Oil Soap for this task. See bottom of article for what other cleaners made our “favorites” list.

PRO TIP: They make special washer/dusting tools than can slip through vent type surfaces, but we’ve found a medium painters brush was the most helpful tool for dusting and washing blinds, intake vents, and closet slat type doors.

☑️ Day 3 – Vinegar all the faucets. Pour enough white vinegar into ziplock bags and submerge shower heads and faucets into the bag. Secure with a rubber band and let set for about an hour. Give a quick scrub and see your hardware shine again. Vinegar is also great on water spots on the hardware (like handles and face plates) around a faucet; simply soak a paper towel in the vinegar and stick to the surface. Check after 30 minutes. If the water stains and grime are especially tough, you may need to reapply the vinegar to the paper towel and let it sit a while longer.

☑️ Day 4 – Bedding! Wash curtains, sheets, comforters, bed skirts, throw pillows, area rugs. Dust bed feet/wheels, turn the mattress. Pull items out from under the bed to organize (and maybe toss or donate) and don’t forget to vacuum under there too.

☑️ Day 5 – Pantries. Pull EVERYTHING out of the pantry and throw away expired items. You’d be surprised how much gets pushed to the back and lost in the shuffle of daily life. Wipe down the storage shelves, walls, and floors. See our article about organizing for further tips.

☑️ Day 6 – Smallest bathrooms. The half baths and the guest baths. Cleaning top to bottom; fan vents, dusting, tiles, walls, floorboards, then floors.

☑️ Day 7 – Main bathrooms. The primary bath and regularly used bathrooms. Cleaning top to bottom. (Leave inside the cabinets for tomorrow.)

☑️ Day 8 – Bathroom cabinets and storage. Remove everything from under cabinets and in drawers. Toss old items. Dust and wipe down drawers and cabinet floors. Organizing what you are putting back helps to make early morning routines go faster.

☑️ Day 9 – Vacuum and dust the couch, chairs, tables. Remove cushions and if needed or able launder covers, pillows, seat cushions. Vacuum the frame of the couch. Use that trusty paint brush to dust cracks and crevices of dining chairs and details of furniture where dust gathers. Wipe these items down with a damp cloth and dry immediately, as wood and water are not friends.

☑️ Day 10 – Linen Closet. Remove EVERYTHING. Toss things like old hair products and makeup.

  • Folding towels with the exact same folding method makes things fit better. We like the half, half, thirds method: Fold towel long ways in half, then in half again. Then turn and fold into thirds by folding the left side in, and the right side over for storing. Makes kind of a “G” shape when you see it on the shelf. Organizing the towels by color is a visual trick that makes the linen closet LOOK even MORE organized.
  • Fold sheet sets by style; stacking the folded matching pillow cases, flat, and fitted sheets in a pile together. Use one of the pillow cases from each set to store the whole set in. This keeps them from getting separated from their matches, and also keeps them from falling all over the closet when you go to pull a new set. Makes them easy to identify and grab by design too!

☑️ Day 11 – THE REFRIGERATOR. Again, remove everything. Toss expired items. Clean shelving and drawers by removing them. Dawn dishsoap works great for this task. Organize for an easier time finding things. If you need more ideas on organizing the refrigerator, see our past article.

☑️ Day 12 – The “JUNK” Drawer. Toss the random soy sauces and add the pennies to your change jar. Pencil trays (ours are from the Dollar Tree) make great organizers for grouping like items together in catch-all drawers like this. For example, we have several trays in ours; one for batteries; one for scissors/ screw drivers/ Allen wrenches; another for rulers/ tape measures; one for rubber bands, nails, and thumb tacks, one that gathers all the other randomness that ends up in this drawer.

☑️ Day 13 – The primary closet. This one is always a doozy for us, so we wrote a whole article about it HERE.

☑️ Day 14 – Vacuum the fridge coils and change the water filter. Did you know: Dust build-up is one of the biggest reason refrigerators need repair? Vacuum the dust build-up from under and behind the fridge to keep this appliance COOL. They make tools for this task that look like super long bottle cleaners; found at any home improvement store.

☑️ Day 15 – STOVE/OVENS. Time to scrub the oven, and clean the floor underneath it. Chances are things have dripped down there over the last few months. (Thanksgiving, anyone?!) Check your owner’s manual for the proper way to perform this maintenance on your oven brand/model. This is a good time to clean and detail the microwave too. For microwaves that hang over stoves; the oil and steam from cooking builds up in the fan areas of the microwave. Be sure to really scrutinize it.

☑️ Day 16 – GROUT. Investing in a steam mop may be the easiest and most effective way we’ve found to clean tile grout. We give our recommendation of brand and model below. Our steam mop DRASTICALLY cut down the time or need to scrub the entirety of our floor grout with a toothbrush. THANK GOD!

Our MOST-LOVED cleaning supplies:

Dawn Power Shot – If you have not tried this stuff yet, YOU MUST! Simply spray those tough-to-clean, (or even dried-on dishes, or burnt-on pans once they are cooled) with this stuff and let it sit for 5 minutes. It will wash away with a little sponge scrubbing like nothing. It’s amazing. We’ve even used it on soap scum.

Pro Tip: If cleaning canvas (like on outdoor furniture); plain blue Dawn dish wash with a little water and scrubbing by hand got the mildew stains out like magic, without breaking down the fabric like bleach does. Simply spray off the surface with a hose, apply some Dawn, scrub and let sit for 5 minutes, then rinse.

Mrs. Meyers Spray Cleaners – THESE SMELL AMAZING! Our favorite is the lavender and the verbena. Great for bathrooms and kitchens to make you feel like you might live in an actual spa.

Molly’s Marvelous Scrubbing Stones – Hard water build up on toilets or porcelain sinks be gone! Just make sure to use a very light hand, you want to scratch away the mineral build up, not the surface of the porcelain.

Murphy’s Wood Floor Cleaner – The smell of this stuff is amazing. I break it out to wipe down cabinets, floor boards, blinds, and doors; leaving the whole area smelling like a lemon pine dream!

Bar Keeper’s Friend or Bon Ami – Hard water stains are broken down so much easier with this powder. It’s also great on pan bottoms to keep them not only looking good, but conducting heat properly.

HandyClean – Rinse Free Sanitizing Wipes – This is our go-to cleaner-and-towel in one. It makes cleaning so quick!

Swiffer Dusters – I’ve tried the off brands and they never work as well as these lil beauties. The Swiffer duster model with the extending arm saves me from working harder than I need too.

Swiffer Wet Jet Mop – This little mop makes mopping the quickest part of cleaning. I will never go back to a regular giant mop and sloshing bucket full of water.

Bissell Pro Heat Carpet Cleaner – If you have pets or kids, or even just lighter colored carpets, a carpet cleaner like this can be very beneficial.

Bissell Steam Mop – If you have tile and grout, you need a steamer mop. This is the secret to keeping your grout as clean and as close to its original color as possible.

Shark Rocket Duo Clean Vacuum – PERFECT cord length. The BEST vacuum for hardwood floors and tiles because it has one roller that is fluffy for polishing. It’s the smallest vacuum I have ever owned, and yet it is also the most powerful one I have ever owned. Seriously, sometimes this thing is trying to run away from me. I love it!

Do you have a cleaning tip that saves time or a cleaning product that you love? Share it with us on our social media: @DeAnnaAndCompany on Instagram and Facebook.

Recipes

Gone Viral: French Onion Pasta

This French Onion Pasta started on TikTok, and it has taken over our news feed. We decided to try it! The verdict: It was pretty good! It doesn’t beat an actual bowl of French Onion Soup, but it is more filling than soup alone. If you’ve ever had a “deconstructed” French Onion Soup, it gives a very similar vibe. Here’s how we made it.

Ingredients:

  • 2 tablespoons – Butter
  • 1 large – Onion
  • 1/8 cup – Sherry
  • 1/4 cup – Dry White Wine like Pinot Grigio
  • 5 sprigs – Fresh Thyme
  • 8 oz. box – Rigatoni
  • 3 cups – Beef Stock or Broth (Stock will be a bolder flavor)
  • 1 teaspoon – Worcestershire Sauce
  • 1/4 cup – Grated Parmesan Cheese, freshly grated will taste better than jar
  • 1/4 cup – Half-and-Half
  • Salt and Pepper to taste

Directions:

  1. Melt butter in a large stock-type pot on medium heat. Thinly (the thinner the better) slice the onion and add to the butter. Add a heavy pinch of salt to the onion, stir to incorporate the onion, butter, and salt. Cover and cook for 5 minutes, NO PEEKING.
  2. Remove lid and reduce heat to low. Let onions continue to cook for 20 minutes, stirring occasionally until they are caramelized.
  3. Deglaze the pot by adding the sherry and wine to the pan and using a spatula to scrape up the browned bits from the bottom of the pan.
  4. Add sprigs of thyme and a little salt and pepper to taste.
  5. Add UNCOOKED rigatoni to the pot.
  6. Add beef stock and Worcestershire sauce to the pot. Bring to a boil and cook until pasta is al dente, about 15 minutes.
  7. Turn off heat and remove pot from burner. Carefully fish out the thyme sprigs and discard.
  8. Slowly add parmesan and the half-and-half to the mixture and stir until pasta is well coated.
  9. Serve immediately; garnish with a sprinkle of additional fresh parmesan.
Curb Appeal

St. Augustine Lawn Care

Keeping a lawn alive in Florida can be a daunting task, but we’ve got all of the tips to keep a St. Augustine lawn plush and weed-free year round!

The trickiest thing about keeping St. Augustine weed-free is that MOST of the sprays you buy at a big box home store is not made for St. Augustine grass, and can even kill it. Read the label to find out if a spray or food is appropriate for St. Augustine before you purchase and use. We’ve found the most knowledgeable info about lawn care products from our local nursery, because they specialize in and curate their selection of products based on the exact area we live in.

Feeding and weeding – These chemicals are only applied at certain times of the year in a certain range of temperature. Going outside of those guidelines can kill your lawn. Read labels carefully and apply when the weather and time is right.

Fertilizer – Make sure you are following your city ordinance when it comes to the type of fertilizer you use and how you use it. Because run off from this chemical is detrimental to our beautiful Florida water ways, many counties only allow for it during small windows or under specific conditions. Make sure you check your city’s website for guidance.

Cutting – The taller any type of grass is, the deeper the roots are. The deeper the roots, the healthier your lawn will be because it can find resources to better protect itself from the hot Florida sun. SO, when it comes to mowing your lawn you want to set the blade on the highest (tallest) setting possible; if what you desire is a plush lawn that always looks healthy. Cutting a Florida lawn (regardless of the type of grass) on the lowest (shortest) blade setting results in burns and dead patches because the lawn likely has shorter roots, blunted blades and no way to protect itself from the burning sun.

Mulching Blade – Ideally select a mower with a mulching blade, where it cuts the grass very finely into a mulch that you do not bag, but instead leave distributed on the lawn as you mow it. This mulch feeds nutrients back into the lawn and also helps to block out weeds. If you have the appropriate “mulching blade” on your mower, there should never be big mounds of mulch – it’s so finely chopped and distributed evenly as you mow, you can barely notice it’s there at all.

Schedule – We cut the lawn once every 1.5 to 2 weeks in the summer. Cutting it weakens the blade’s protection in the sun – so if it is especially hot and sunny out we will try to push it towards two weeks.

Cut in the cooler times of the day – Cutting the lawn shocks it, so do it in the gentler parts of a Florida summer day, like just before sunset, the night before the sprinklers will go off. We also look for overcast days as well.

WATER –While St. Augustine grass is drought tolerant, it still needs water. Water on the days your city allots for. Water it regularly to supply the roots with everything it needs to survive and thrive in a Florida summer. Best time to water is early in the morning, just before sunrise.

Winter – Usually around October we stop cutting the lawn as regularly. When it’s in the most dormant part of the season it’s is also vulnerable. Spread your mowing out to “as needed” instead of maintaining a regular schedule. St. Augustine grows slower in the winter as well, so there’s no need to be as aggressive with the maintenance. Let it rest.


Looking for more lawn tips? Check out these past articles:

Tools: Hedgers and Edgers

Sod vs. Seed, which is better?

Stop Bagging Leaves


Home Hack

Create a Cozy Coffee Bar

Do you love coffee/tea or have a coffee lover in your life? A cozy coffee bar would make a thoughtful yet functional gift for Valentine’s Day! Here’s a few ideas and items to get that daily coffee consumption dialed in.

If you read our last article, you know we are trying to stay more on budget by reducing our coffee outings. The presentation and ease of use is what makes fixing a cup at home thus staying on budget easier. When designing your stations, be sure to create a fun *experience* through presentation, taste options, and functionality.

Creating a cozy coffee bar is pretty simple, and you might even already own everything you need to make it, remember the key is the presentation and experience. *magical twinkle noises*

Start with a list: What do items do you (or who you’re creating for) use to make coffee? What are the “must have” items? Is it coffee beans vs. k-cups situation? Need filters? Are there pumps for flavors? Sugar? Splenda packets? Tea bags? Paper cups? Make a list with two columns; one for what is currently used every time you make coffee, and another for wish list things that would make a home coffee experience better. It will also let you know how many containers and the type of storage that will be most useful for individual’s needs.

Space: Select a nook, unused counter space, or a small cabinet. When choosing a cabinet look for one with a flat top space, and a deep drawer or cabinet with doors for hiding supplies away.

Pro Tip: Old buffets and sideboards make for great coffee bars. Try upgrading a used cabinet if you have one with good bones.

Location: Will the location be far from water and/or the fridge? Is a trash bin nearby? Consider a mini fridge, water source, and waste basket to make the space more functional.

Organize: Small clear acrylic trays are fantastic for organizing items like tea bags, sugar packets, and non-dairy creamer cups.

Incorporate some canisters: Pretty canisters not only organize your brewing supplies, but keep the design aesthetic going too!

Pick a color scheme before you start purchasing items.

Specifically a three colors scheme:

  • Choose a main color (aqua, for example) and purchase as many items as you can in that color.
  • Choose a secondary neutral color for other items that you can’t find in the main color. (Grey or black are usually safe choices in the coffee world.)
  • Decide if you are going to have silver or gold accents, then choose items like silverware and door handles or knobs in that metal.

Choosing a consistent color palate is more visually appealing because it unified. Bonus; things will *appear* visually organized simply because the colors are the same.

Pick a theme: Will it be whimsical -or- matching to the home’s decor? Do they love Disney? Harry Potter? That’s “whimsical.” Are they more Farmhouse? Mid Century? That’s decor matching. Look up items online to get a sense of what you’re looking for to create a cohesive look. Note: You *can* create whimsical coffee bars that match the decor of a home.

Accessorize: This is the fun part! Use cake trays and baker’s tiers to further organize your coffee bar. Little signs, and small decor in your theme make it fun too.

Make it fancy: Add syrup flavor pumps or accessories like an automatic frother to feel even more like your own personal coffee shoppe.

Upgrade the brewing: If your love’s coffee maker is looking rough, give it a good deep cleaning, or upgrade to a newer model.

Deals: There are so many cute items like the ones pictured here that I have found around town. Stop in and see what you can find for less locally.

  • Target: in the “Bullseye Playground” at Target. This is the value/dollar spot at the entrance of the store. Most items are usually $5. This week they had wooden organizers, cups, tiered trays, mini shelves, mini trash cans, and so much more.
  • Dollar Tree: Placemats and runners, candy-type glass jars with tin lids for organizing, spoons, cups, mini trash cans, etc.
  • Goodwill or Garage Sales: A good resource for used furniture to convert into your coffee bar (buffets, sideboards, cabinets), bar accessories and decorations, things to use as organizers, vintage glassware, cake stands, and tiered stands too.
  • Hobby Lobby: for upgrading doorknobs and handles, little signs, decor. Don’t forget to get the 40% off coupon on their website.
  • Ross: Silverware, cute mugs, decor, coffee syrups, fancy teas and honey, even decorative disposable coffee cup packs.
  • TJ Maxx: Decor, silverware, and cute mugs – especially in popular themes like Disney, Rae Dunn, Harry Potter, etc.
  • Tuesday Mornings: Decor, mugs, and decorative disposable coffee cup packs.
Recipes

Cupid’s Bark

It’s like the best chocolate-covered crunchy goodness there ever was! What’s more, it looks cute in jars, tins, or clear baggies for Valentine’s Day! Oh, and it’s easy to make too!

Ingredients: This is an estimate of quantities. The toppings of this bark are applied like ice cream toppings, so it’s really to your preference.

  • 1 bag of milk chocolate chips
  • 1 bag of white chocolate chips (optional)
  • 1 box of Nilla Wafers

Toppings:

  • 1 bag of Valentine’s colored m&m’s, sprinkles, or other decorations.
  • 3/4 cup of dried fruit (ex. cherries, strawberries, cranberries, or a mix)
  • 3/4 cup fresh fruit (ex. raspberries, blueberries; fruits that have little-to-no juices that will spill out and soggy your bark)
  • 1 cup of mini pretzel, pretzel squares, or broken pretzel pieces

Directions:

  1. Start by arranging Nilla Wafers (round side up) on a large, wax paper-lined cookie sheet.
  2. Melt chocolate in microwave. You can use all one type of chocolate, or create a half and half pan, or use one type of chocolate for the base and another for a decorative drizzle; there are no rules!
  3. In a microwaveable bowl, combine 1 bag of chocolate chips and 1 teaspoon of vegetable oil.
  4. Microwave on high for about 3 to 5 minutes; stirring the mixture every 20 seconds until fully melted. A heat-safe silicone spatula works best, in our opinion. Melt times will vary, do not over cook.
  5. Using a heat safe spatula, spread the melted chocolate over the Nilla Wafers. (Then the hard part is over!)
  6. Spread your toppings over the chocolate quickly while it is warm so that they will stick to it. Be sure to gently press larger pieces down into the chocolate.
  7. I like to cool the creation (pan and all) in the fridge for at least 30 minutes.
  8. Break apart the bark with clean hands, or by using a kitchen mallet.
  9. Place in parchment bags, bakers boxes, or air-tight containers.

Store this bark in the fridge to keep the chocolate firm and to preserve the fruit toppings.

Curb Appeal

Updating Door Hardware

We recently updated an exterior door, painted the front door, and upgraded our fence door; so now we have door hardware on our minds! We’ve found a LOT of modern options for doors when it comes to aesthetics AND security. Let’s see what we can find on Amazon!

Did you know?! Copper, brass, and bronze door handles are naturally “antimicrobial?” Meaning, door knobs made of these materials continuously fight germs and bacteria all on their own, while standing up to the wear and tear of daily living. Who knew!

Entryway Doors:

The hardware on a door can make an old door look more modern. (Once you update the hardware, you’re probably going to want to paint it too – luckily we have an article to show you how we did it and what products we used.)

If security is your concern:

Touch pad and keyless options are popular, because most models allow you to change the “pin” as often as you want. That’s like getting a new lock and key every month, should you desire it. There’s also models where you can set specific PIN numbers for specific people so you know what happened, by who, and when; should anything go awry.

For an extra sense of doorway security, consider popular doorbell camera options. Even upgrading an old non-working doorbell can help better alert you to guests on your doorstep.

Security isn’t just for entry doors and doorways. Secure closets and storage spaces with interior versions.

Non-Locking Doors:

“Passage doors” (doors without locks) are fantastic places to introduce a little decorative flare. Consider these “pretty” door knobs that are faceted shimmering glass, brushed brass, or oiled bronze.

Speaking of non-locking doors; you can even update dresser and cabinet pulls to match your fancy new door knobs with these options.

Sliding Doors:

Bring an old patio door back to life with new slider hardware.

Don’t Forget the Garage:

A garage door might not have traditional handles, but that doesn’t mean you can’t give this door a simple update with accent magnets, keyless entry, and rubber moulding to help keep the rain out during storms.

Fence Gates:

You can even update old rickety fence door handles. (However, updating the whole fence tends to warrant a professional.)

How will you be sprucing up your home this spring? Share your home project wins with us on our social @DeAnnaAndCompany 

Curb Appeal

Buying a Home in 2023

It’s no secret that the 2022 real estate market was a volatile one. Today we’re discussing the current real estate market to decide if home ownership in 2023 is a viable option for you.

  • Goldman Sachs’ G-10 home price model suggests home prices will decline by around 5% to 10%from the peak.
  • Freddie Mac anticipates the for-sale cost of a home to drop .2% in 2023.
  • These stats are from this article on Houwzer.

While it is not predicted that housing costs will drop significantly in 2023, it is widely predicted that prices and loan rates will remain more stable, rising slowly instead of the craziness that was 2022. However, in order to get that stabilization of the market, interest rates remain higher than average. What that means for consumers is less home for more payment.

All hope is not lost. Home ownership is still an option for a lot of people with steady incomes and good credit. It’s important that you start behaving like you are applying for a home loan, even before you start looking for the house.

  • Keep paying the rent on time.
  • Make credit card payments on time.
  • Make auto loan payments on time.
  • Do not make any new big purchases.
  • Do not apply for new credit; which includes not financing things like furniture or big trips.
  • Do not buy a new car just because you are tired of the old one.

“How do I buy a home in this market? Everything I want is so expensive and home ownership seems impossible.”

This is the hard part. We believe, if you are committed to being a home owner, you must enter the market as soon as you can, even if the house you can afford does not check ALL of your boxes. To explain, you might have to get a starter home that appropriately reflects your budget, not your dreams. While you may *want* 5 bedrooms, but only *need* 2; find a desirable property that gets you into a home and matches your budget. In other words, new home hunters will likely have to settle for a bit less than they desire.

“If I buy within my budget, what should I be looking for?”

You should still look for *smaller* versions of your ideal home. Find the “worst” house in the best neighborhood.

“What do you mean by ‘Worst home in the Best Neighborhood?'”

Think mild to moderate fixer upper. Look for a solid home with “good bones,” but may need help with cosmetic things like paint, landscaping, updating cabinetry or faucets, etc. Ask your realtor if there is any inspection information available for the homes you are interested in. If you find a home, be sure to get an inspection on the property before you buy the home. Find a home that needs a little love, but not one that will become a money pit. Home Inspectors can help you identify the potential of expensive problems like:

  • Outdated electrical
  • Structural issues
  • Plumbing problems (especially ones that seem to be reoccurring)
  • Water well trouble
  • Sink hole warnings
  • Septic tank issues

“Why should I buy a home that is not my dream home?”

When you are a home owner, you leverage your current home to get you into your next home. It becomes easier to buy the next level of home when your current home increases in value.

“If I am already a home owner but am struggling with inflation and making mortgage payments, what is your advice?”

Make. Your. Mortgage. Payments. Defaulting on your mortgage impacts your credit score significantly. You need good credit to get credit. Equally important payments to attend to are:

  • Credit Cards
  • Auto Loans

If you are struggling, do not put items you cannot afford on credit. Credit cards should only be used to buy you a little time and build your credit, not to “worry about later” or purchase things you cannot afford.

We have created a list of income leeching culprits to investigate to help you FIND MONEY QUICKLY without creating a “budget.” Check out the article here.

What is the downside to owning a home?

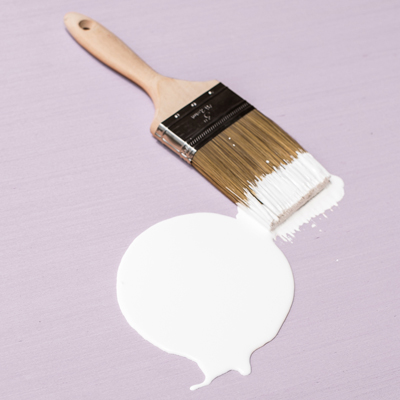
The downside is, you pay for everything. There is no more landlord to “fix” things for free, so you want to keep in mind that there will be hidden costs of home ownership. Typical expenses that arise (usually over several years) of owning a home are;

  • Lawn Care
  • Pest Control
  • Tools
  • Broken Appliances
  • Broken Water Heaters
  • Failing Air Conditioners
  • Plumbing Issues
  • Roofing and Leaks

What is the upside of owning a home, rather than renting?

YOUR Investment: The upside of home ownership is the money you used to pay to some else as rent, becomes an investment in something YOU OWN and can leverage for future housing.

Predictable Payments: Home ownership with a fixed rate also locks you into a predictable payment, instead of getting the rent raised on you again and again.

No more moving to save money: In a similar vein, when you own a home, you don’t have to move again every 6 months to a year just to get a better rental rate from another landlord.

Refinancing for even lower payments/loan rates: A few years in to owning the home, should interest rates drop, you can refinance your mortgage loan to potentially receive an even lower predictable payment. (That’s where you call us again! 😃)

How can I help my children buy a home in the future?

If you can afford to finance a second property, that is the best way you can secure a home for your children in the future. This is a means to lock in today’s purchase prices, instead of the potentially higher home pricing that will exist 10 to 20 years from now. The idea is; investing in a second property now and using that home as a way to generate extra income through renters. In the future the property would be turned over to their grown children; to live in, leverage for another home, or manage the rental for income.

Home Ownership is a topic that we could discuss forever, and this article is aimed to give a general insight into purchasing a home in 2023. We feel it is better to get advice based on real-world numbers for individual situations. Call us for a more personalized suggestion based on your client’s or your own exact situation.

Contact DeAnna today! D&CO. is always here to help with your mortgage and industry questions.