Home Hack

A GOOD NIGHT’S SLEEP

Now that you’re hopefully sleeping on the PERFECT mattress, if you still find yourself having restless nights, it could be due to a number of different things in your environment or on your mind. We’re here to share the things that help us sleep better in hopes that they help you to sleep better too!

WORRYING about <fill in the blank>:

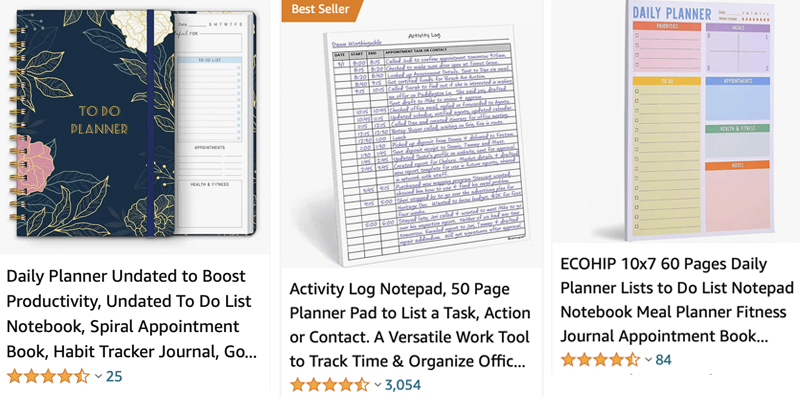
Work, kids, chores, bills, schedules, even vacation can keep us up at night. The best thing that helps us get sleep when we are worried about a busy day(s) ahead is to get ready for bed, lay in bed and make a list of things we have to accomplish for the next day. This is especially helpful with deadlines or time-sensitive tasks. It even works with goals. We find when we make writing down the next-day’s tasks or goals a nightly habit, we go to bed calmer because everything is accounted for on the list.

This also works for sleeping the night before a trip. Simply make a list of everything you need to remember for the morning and see if you’re more successful catching some peaceful pre-vacation ZZZ’s.

Try keeping a pen and journal or task sheet near the bed for easy list/schedule making:

Example items for this article were all found on Amazon.

Anxiety:

When feeling anxious, happy-natured books on Audible helps to take our minds off of the hamster wheel and into sleep mode. Funny celebrity autobiographies, self-help, business topics, hobbies, even whimsical stories from our youth take us away to a not-so-scary place in our imagination. (Audible is basically a modern day Books-on-Tape, and is an Amazon product.)

There’s even a series of meditations on Audible specifically for sleep. I was doubtful anything like that would be all that effective, but I fall asleep EVERY. TIME. In fact, I’ve never made it to the end of the meditation awake, so I have no idea what happens. 😂 The same is true for everyone I’ve suggested them to.

Bonus: the Audible app also has a sleep timer, so it won’t keep you up all night.

TV Shows We’ve Already Watched:

If The Office is on when I am going to bed, I’m probably going to watch it. Despite the fact that I have seen every episode of that series a million times. Whatever the show or movie, there’s something about being entertained but not having to concentrate on the story that gives a sense of calm before bedtime.
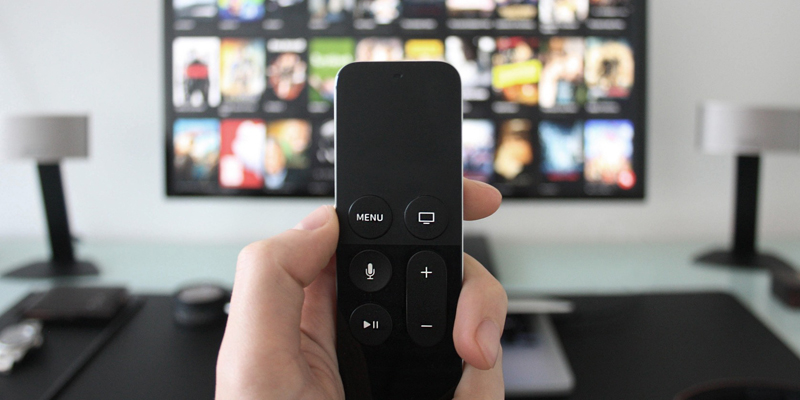
Timer Your TV:

Most modern TV’s have a sleep mode option in the menu. Set it for an hour or so so that it turns off after you fall alseep and doesn’t wake you up during the night.

Put Away Electronics:

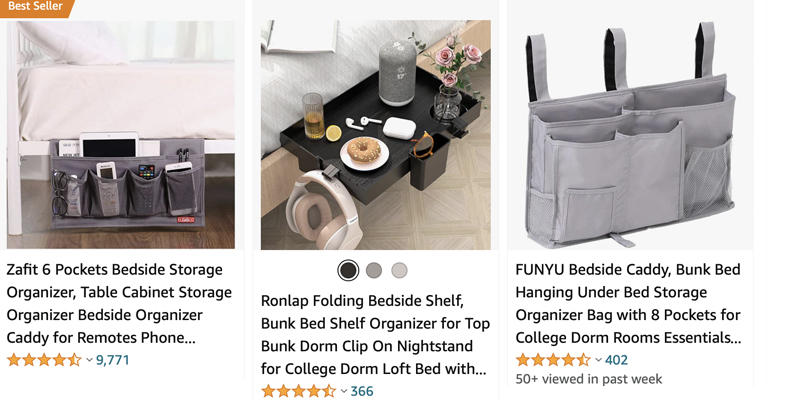
No more jumping down the rabbit holes of everything on the internet and social media before bedtime. Give yourself a cut-off time for looking at electronics. The blue light keeps our brains awake, so an hour before your normal bedtime is a good time to put them away. Store those devices in a drawer or a mattress cubby like these:

Shower or Bath:

There’s something about being clean and fresh before bed. Especially if it’s been a long day, or a day out doors.

Even though it’s Johnson’s – a LOT of adults swear by the Bedtime lavender bath for its calming effects and help with stress headaches.

A Cold Gel Pack:

If I’m stressed out or otherwise not feeling 100%, I like to put a cool gel pack on my pillow behind my neck. I use a first aid refrigerator type gel compress that is in the cloth barrier, and then I cover that pack in a tea towel. It should just be cool, not very cold or freezing. Nothing cold or frozen should be in direct contact with your skin, so a good cloth barrier is an absolute must.

Adjustable Bed Frames:

An adjustable bed frame helps you achieve the perfect sleep position. Ones with the light massage feature, can further help lull individuals back to sleep on restless nights. We talked about these in our recent mattress article, but it’s helped us with sleep so much it’s worth re-mentioning here!

Dark and Cozy:

Black-out curtains, a traditional sleep mask, or an upgraded version with built-in headphones help block out slumber stealing light. The latter are especially helpful if you like hearing music, Audible, or tv while you fall asleep. Keep the volume low and sleep the night away.

Time the Caffeine:

If you are unknowingly sensitive to caffeine, things like coffee, tea, SODA, even chocolate could be keeping you awake when you partake late in the day. I will sleep better cutting these things off 3 hours before bed, while my husband has to avoid caffeine after 2pm. See if you notice a difference by monitoring your caffeine intake hours.

Skip the Late Night Snacks:

Late night digestion can be another sleep-stealing culprit, because the process can keep our body awake, or wake us up needing to use the bathroom. We found cutting meals, drinks, and snacks off at least two hours before bed did the trick.

Talk to Your Doctor:

A friend of ours had a horrible time sleeping, so they talked to their doctor and were prescribed a sleep study. This type of study involved sleeping in a hotel-like room over night while they were monitored through stick-on nodes. Turns out, they had sleep apnea and finally found restful sleep after getting a CPAP machine. We’ve heard sleep studies can be done at home too – talk to your doctor about options.

Do you have a tip for sleeping better? Share it on our Facebook or Instagram posts about this subject @DeAnnaAndCompany

Curb Appeal

It’s GRILL Season!

Grilling season is upon us, so we’re here to share all of the grill products, tips, and accessories we LOVE!

NOTE: ZERO of the items show in this article are sponsored or ads from us. We buy things with our own money and simply loved the results enough to share. Most of the examples below were found on Amazon.

The BEST Grill Sauces:

BBQ:

Hands down, the most crowd pleasing barbecue sauce? ANY style of Sweet Baby Rays. We prefer the original or honey flavors. It’s just dang tasty! If you’re a bbq mustard person, Sonny’s sells bottles of their sauces in the restaurant – and their Carolina style mustard is a great one (so is their sweet bbq sauce).

Hibachi:

We find the Kikkoman brand has a nice tasting *thick* teriyaki sauce; however our FAVORITE version is a thinner “Island Soyaki” from Trader Joe’s. It even has the sesame seeds in it! It makes noodles, veggies, and fried rice taste just like your favorite Hibachi restaurant. Publix also has a thin teriyaki sauce (Publix brand) that we use in a pinch. Terry Ho’s Yum Yum Sauce (we buy it at Publix) is the closest we’ve found to restaurant-style white sauce.  If you’re a ginger sauce person, Makoto makes great restaurant matches too – find it in the Publix (and Walmart) produce section by the refrigerated dressings.

THE SECRET to the MOST DELICIOUS Grilled Chicken and Corn:

BRINE IT. That’s right, a long soak in salty water does wonders for chicken breast, and fresh corn on the cob. See our recipe of the month for cooking corn on the grill!

Safe to Eat:

The easiest way to tell when things are done cooking? A good thermometer! No more squishing all of the delicious juices out of your burgers or chicken. You’ll know when dinner’s ready by temperature alone.

Precision Grilling:

Use a temperature gun to find the exact temperature of your grill. These are especially useful for low and slow barbecuing or making pizzas on the grill.

Charcoal Chimneys:

If you are grilling with charcoal, a starter chimney is a MUST! It gets the coals to grilling temperatures quicker so you can have those hot dogs ready ASAP!

Grilling Baskets:

These little baskets are wonderful for cooking stick-to-the-grill things, like shish-kebabs, veggies, or fish; but also S’MORES, toasted sandwiches, or little pie turnovers. Yes please! 😋

Cast Iron Grill Forms:

Similar to baskets, use these little cast iron forms to enclose sandwiches; like ham and cheese or “grilled” cheese; make pie turnovers with crescent rolls and canned pie filling; omelets and more! Basically any ooey-gooey thing you want to cook on a grill or campfire works great in these. (We love these for the fire pit!)

GRIDDLES:

Blackstone – is an AWESOME grill accessory or alternative that you can use to make all of the typical grill stuff, BUT ALSO hibachi style noodles or fried rice, hot cakes, fish, veg; it’s so versatile!

The best part is the 22″ (fits about 12 burgers) it’s small enough to be portable, so you can take it camping, on vacation, or even use after those post-storm power outages. WE LOVE OURS! You can buy direct or on Amazon, as shown below.

HIBACHI STYLE Pro Tip: Cold day-old noodles and rice make for the best hibachi-style noodles and fried rice on the griddle. Cook (boil) the plain rice and noodles you plan to use the night before and store it in air tight containers in the fridge until it’s hibachi time!

Easier Clean-Up:

Reynold’s Wrap NON-STICK Aluminum Foil is a DREAM! We use it in the oven and on the grill and the food just slides off! Look for this box that says “NONSTICK”:

Dawn’s Power Wash Spray makes tough scrubs SO EASY! Not just for inside dishes, but getting all the baked on goo off of grill baskets or pans too! You just spray it on and let it sit a few minutes, the little micro bubbles break down all the gunk and then it’s super easy to wash. Bonus, the “apple” scented one smells like a big ol’ basket of Granny Smith apples! 🍏

Make the Grill Last:

We noticed a marked difference in how long our grill lasts when it is covered, vs. the ones we thought would be okay because it’s stored under the shade and protection of a roof. Our 5-year-old grill still looks relatively new, and we think that is all thanks to using a weather proof cover that is vented. We usually cover it the morning after we’ve used the grill, to make sure everything is cooled down.

We find this type of brush/scraper cleans the gunk off the easiest.


Do you have a favorite grill accessory? Favorite type of grill? Share all of your product recommendations and grill tips with us on Instagram or Facebook @DeAnnaAndCompany


Curb Appeal

What to Expect When You’re… Resurfacing the Pool

If you own an in-ground pool, you’ll likely face the dreaded “pool resurfacing” at some point. Don’t worry, when you hire a reputable company, it’s not as bad as one would think! This process is necessary to keep your pool healthy, and also provides an opportunity to sneak in a few design updates. With a new water tint and a few new pool tiles, your dated pool can feel like a brand new paradise, potentially with minimal increase to the budget. (We’ll explain.)

To start, we recommend asking your neighbors and friends with pools for a good local pool resurfacing company recommendation. Google reviews are another place to find current customer feedback. Make sure the company you hire is licensed, insured, and experienced. Visit local pool tile stores for inspiration and recommendations. We got our natural-stone-pool-artist recommendation by visiting our local pool tile store. (The pool tile store didn’t sell natural stones or do that service, but they knew who did.)

pool water

Q: What can I expect when I have my pool resurfaced?

Your pool will be drained. It’s gonna get weird.

The pool will look strange for a bit. It will be sanded down in stages and then built back up. You’ll likely be surprised at how DEEP and SCARY it looks when it’s empty. There’s a lot of dust and the work can get noisy at times. A good contractor will keep things as tidy, safe, and as efficient as possible.

pool resurfacing

The resurfacing process is an average of 5 to 7 days.

Our pool is small (12,000 gallons) and it took 7 days. HOWEVER, we had significant upgrades to change the pool from plain plaster and 4×4″ tiles to large natural stones, which required a special pool stone artist and a bit more time to fit them together like a giant mosaic. If we had stuck with plain tile and plaster, it probably would have been completed in about 4 days.

Filling the pool takes a while.

You’d think a full blast hose would fill it in no time, but pools are much larger than you think! This means don’t try and schedule your pool resurfacing and a pool party in the same week. Give it some breathing room.

filling a pool with garden hose


DYK? You can save money on the water used to refill the pool by contacting your water company.

Water companies typically have lower rates for filling a pool. You have to contact your provider before you pay the bill so your account can be adjusted; they basically charge you for the fresh water and take out the automatic sewage costs associated with the relevant gallon usage. The sewage waste cost is twice the price of the fresh water cost, so the savings is significant. Since this is a special rate, it can only be applied every so many months for special circumstances like this.

Pro-Tip: This special savings is usually applicable for the water usage caring for newly installed sod lawns too!

fill the pool with hose

Things can cost less if you plan ahead.

When you’re faced with a resurface, there’s a lot of opportunity to save money and time by getting things done now while the pool is stripped down instead of down the road. Save yourself the time and headache by getting pool problems addressed at the same time. Now is a great opportunity for:

  • Design updates like new tiles/ coloring

pool tile

Tired of the old, dated, or maybe clashing tile design? Now’s a great time to switch it out. Simple 4×4″ tile accent (edge) changes are usually the least expensive way to give the ol’ swimming hole a facelift above the water line.

  • Adding or changing railing, the tint of the pool water, etc.

Pro Tip: If you have an older pool, consider adding some design elements to the stairs, such as a tile accent edge, or even just a few 4×4″ tile diamonds to the step make stairs easier to see and judge for depth.

pool stairs

  • Fixes that need to be accomplished by emptying the pool; electrical, lighting issues, leaks, fixing pipes, etc.

Don’t wait to have a leak investigated or a light fixed. Seize the opportunity to get a specialist in there to fix things before it’s a beautifully renovated pool. At the very least, you’ll save the money it costs to refill the pool again should any of that work require a draining.

Pro Tip: Our resurfacing company offered a service to verify everything was in proper working condition. They checked for leaks, lighting issues, and mechanical function so that we could have any repairs done while the pool was stripped down.

pool fix

Don’t get stuck in the rutt of what-was.

We’ve seen many people treat a pool resurface like they treat house paint colors – they paint it whatever it originally was, never having considered if they could create something they like more. This is an opportunity to make an entirely new look! Just because the pool was plain and boring when you bought it, doesn’t mean you need to stick with that color palette. There are so many resurfacing color choices now days, you can really make any pool into a turquoise waters oasis. Create your own little paradise with new tile colors and colored aggregate plaster.

How do I get colored water, like the ocean?

ocean water colors

While this process costs a little more than a plain white plaster surface, it’s been worth the money in durability alone; it also achieved the exact ocean type color we wanted for our pool’s water. Tiny colored specks in the grit (“aggregate”) of the pool walls and floors, works just like the ocean floor; light passing through the water reflects the color of the pool (ocean) floor and walls. This grit is in the plaster that is the finishing coat of the resurfacing process. Our brand of aggregate plaster was called “Diamond Brite” and it gives the pool water its color, makes the pool less slick, and resists stains and deterioration from plant matter and pool chemicals.

Skilled technicians will know what specks of colors produce what color waters. Find an inspiration pool or water picture to communicate your desired color of water to the resurfacing company.

pool and deck

Be sure to check our social media posts about pool-resurfacing; we’re asking our community to share their best LOCAL recommendations for pool-related professionals including care and upkeep, resurfacing companies, maintenance specialists and more.

Share your LOCAL POOL SPECIALISTS recommendations in the comments on social too!

@DeAnnaAndCompany on Instagram and Facebook.


Home Hack

Spring Cleaning Checklist

We’ve got a 16-Days-to-Deep-Clean checklist to get your spring cleaning done with minimal pain. We’re also sharing our best tried-and-tested cleaning tools and supplies to make cleaning even easier. Do these tasks 16 days in a row, or spread them out over the month to keep you moving forward without getting burned out.

We’ve picked up a few cleaning tips that have helped us get through the dreaded deep clean.

  • Start at the top. Cleaning can sometimes get a little messy before it sparkles. Starting at the top of the room, ensures you’re not cleaning things twice.
  • Finish with floors. Mop, vacuum, or sweep your way out from one room to another.
  • Time the cleaners. Give cleaners enough time to do their job, but do not let things like toilet bowl and shower cleaners sit for longer than the bottle directs.
  • Throw away/ shred/ recycle papers you do not need. Of course, if it’s an important document file it. Shuffling random papers around just makes a bigger job to clean up down the road. Shred it and forget it. Old magazines that you have not cracked open in a year do not need to keep clogging up space in the home. Recycle them.

THE 16 DAYS TO DEEP CLEAN CHECKLIST:

☑️ Day 1 – DUST! Dust ceiling fans, vents, lamps, blinds, and finishing with floor boards. If it’s been a while since your last deep dusting, you may need to run a vacuum.

☑️ Day 2 – Wash blinds, slatted doors, and floor boards. We find the easiest way is to fill up a bucket of soap and water, gather a few shop rags and oddly, a paint brush (see pro tip below). We like Murphy’s Wood Oil Soap for this task. See bottom of article for what other cleaners made our “favorites” list.

PRO TIP: They make special washer/dusting tools than can slip through vent type surfaces, but we’ve found a medium painters brush was the most helpful tool for dusting and washing blinds, intake vents, and closet slat type doors.

☑️ Day 3 – Vinegar all the faucets. Pour enough white vinegar into ziplock bags and submerge shower heads and faucets into the bag. Secure with a rubber band and let set for about an hour. Give a quick scrub and see your hardware shine again. Vinegar is also great on water spots on the hardware (like handles and face plates) around a faucet; simply soak a paper towel in the vinegar and stick to the surface. Check after 30 minutes. If the water stains and grime are especially tough, you may need to reapply the vinegar to the paper towel and let it sit a while longer.

☑️ Day 4 – Bedding! Wash curtains, sheets, comforters, bed skirts, throw pillows, area rugs. Dust bed feet/wheels, turn the mattress. Pull items out from under the bed to organize (and maybe toss or donate) and don’t forget to vacuum under there too.

☑️ Day 5 – Pantries. Pull EVERYTHING out of the pantry and throw away expired items. You’d be surprised how much gets pushed to the back and lost in the shuffle of daily life. Wipe down the storage shelves, walls, and floors. See our article about organizing for further tips.

☑️ Day 6 – Smallest bathrooms. The half baths and the guest baths. Cleaning top to bottom; fan vents, dusting, tiles, walls, floorboards, then floors.

☑️ Day 7 – Main bathrooms. The primary bath and regularly used bathrooms. Cleaning top to bottom. (Leave inside the cabinets for tomorrow.)

☑️ Day 8 – Bathroom cabinets and storage. Remove everything from under cabinets and in drawers. Toss old items. Dust and wipe down drawers and cabinet floors. Organizing what you are putting back helps to make early morning routines go faster.

☑️ Day 9 – Vacuum and dust the couch, chairs, tables. Remove cushions and if needed or able launder covers, pillows, seat cushions. Vacuum the frame of the couch. Use that trusty paint brush to dust cracks and crevices of dining chairs and details of furniture where dust gathers. Wipe these items down with a damp cloth and dry immediately, as wood and water are not friends.

☑️ Day 10 – Linen Closet. Remove EVERYTHING. Toss things like old hair products and makeup.

  • Folding towels with the exact same folding method makes things fit better. We like the half, half, thirds method: Fold towel long ways in half, then in half again. Then turn and fold into thirds by folding the left side in, and the right side over for storing. Makes kind of a “G” shape when you see it on the shelf. Organizing the towels by color is a visual trick that makes the linen closet LOOK even MORE organized.
  • Fold sheet sets by style; stacking the folded matching pillow cases, flat, and fitted sheets in a pile together. Use one of the pillow cases from each set to store the whole set in. This keeps them from getting separated from their matches, and also keeps them from falling all over the closet when you go to pull a new set. Makes them easy to identify and grab by design too!

☑️ Day 11 – THE REFRIGERATOR. Again, remove everything. Toss expired items. Clean shelving and drawers by removing them. Dawn dishsoap works great for this task. Organize for an easier time finding things. If you need more ideas on organizing the refrigerator, see our past article.

☑️ Day 12 – The “JUNK” Drawer. Toss the random soy sauces and add the pennies to your change jar. Pencil trays (ours are from the Dollar Tree) make great organizers for grouping like items together in catch-all drawers like this. For example, we have several trays in ours; one for batteries; one for scissors/ screw drivers/ Allen wrenches; another for rulers/ tape measures; one for rubber bands, nails, and thumb tacks, one that gathers all the other randomness that ends up in this drawer.

☑️ Day 13 – The primary closet. This one is always a doozy for us, so we wrote a whole article about it HERE.

☑️ Day 14 – Vacuum the fridge coils and change the water filter. Did you know: Dust build-up is one of the biggest reason refrigerators need repair? Vacuum the dust build-up from under and behind the fridge to keep this appliance COOL. They make tools for this task that look like super long bottle cleaners; found at any home improvement store.

☑️ Day 15 – STOVE/OVENS. Time to scrub the oven, and clean the floor underneath it. Chances are things have dripped down there over the last few months. (Thanksgiving, anyone?!) Check your owner’s manual for the proper way to perform this maintenance on your oven brand/model. This is a good time to clean and detail the microwave too. For microwaves that hang over stoves; the oil and steam from cooking builds up in the fan areas of the microwave. Be sure to really scrutinize it.

☑️ Day 16 – GROUT. Investing in a steam mop may be the easiest and most effective way we’ve found to clean tile grout. We give our recommendation of brand and model below. Our steam mop DRASTICALLY cut down the time or need to scrub the entirety of our floor grout with a toothbrush. THANK GOD!

Our MOST-LOVED cleaning supplies:

Dawn Power Shot – If you have not tried this stuff yet, YOU MUST! Simply spray those tough-to-clean, (or even dried-on dishes, or burnt-on pans once they are cooled) with this stuff and let it sit for 5 minutes. It will wash away with a little sponge scrubbing like nothing. It’s amazing. We’ve even used it on soap scum.

Pro Tip: If cleaning canvas (like on outdoor furniture); plain blue Dawn dish wash with a little water and scrubbing by hand got the mildew stains out like magic, without breaking down the fabric like bleach does. Simply spray off the surface with a hose, apply some Dawn, scrub and let sit for 5 minutes, then rinse.

Mrs. Meyers Spray Cleaners – THESE SMELL AMAZING! Our favorite is the lavender and the verbena. Great for bathrooms and kitchens to make you feel like you might live in an actual spa.

Molly’s Marvelous Scrubbing Stones – Hard water build up on toilets or porcelain sinks be gone! Just make sure to use a very light hand, you want to scratch away the mineral build up, not the surface of the porcelain.

Murphy’s Wood Floor Cleaner – The smell of this stuff is amazing. I break it out to wipe down cabinets, floor boards, blinds, and doors; leaving the whole area smelling like a lemon pine dream!

Bar Keeper’s Friend or Bon Ami – Hard water stains are broken down so much easier with this powder. It’s also great on pan bottoms to keep them not only looking good, but conducting heat properly.

HandyClean – Rinse Free Sanitizing Wipes – This is our go-to cleaner-and-towel in one. It makes cleaning so quick!

Swiffer Dusters – I’ve tried the off brands and they never work as well as these lil beauties. The Swiffer duster model with the extending arm saves me from working harder than I need too.

Swiffer Wet Jet Mop – This little mop makes mopping the quickest part of cleaning. I will never go back to a regular giant mop and sloshing bucket full of water.

Bissell Pro Heat Carpet Cleaner – If you have pets or kids, or even just lighter colored carpets, a carpet cleaner like this can be very beneficial.

Bissell Steam Mop – If you have tile and grout, you need a steamer mop. This is the secret to keeping your grout as clean and as close to its original color as possible.

Shark Rocket Duo Clean Vacuum – PERFECT cord length. The BEST vacuum for hardwood floors and tiles because it has one roller that is fluffy for polishing. It’s the smallest vacuum I have ever owned, and yet it is also the most powerful one I have ever owned. Seriously, sometimes this thing is trying to run away from me. I love it!

Do you have a cleaning tip that saves time or a cleaning product that you love? Share it with us on our social media: @DeAnnaAndCompany on Instagram and Facebook.

Curb Appeal

Updating Door Hardware

We recently updated an exterior door, painted the front door, and upgraded our fence door; so now we have door hardware on our minds! We’ve found a LOT of modern options for doors when it comes to aesthetics AND security. Let’s see what we can find on Amazon!

Did you know?! Copper, brass, and bronze door handles are naturally “antimicrobial?” Meaning, door knobs made of these materials continuously fight germs and bacteria all on their own, while standing up to the wear and tear of daily living. Who knew!

Entryway Doors:

The hardware on a door can make an old door look more modern. (Once you update the hardware, you’re probably going to want to paint it too – luckily we have an article to show you how we did it and what products we used.)

If security is your concern:

Touch pad and keyless options are popular, because most models allow you to change the “pin” as often as you want. That’s like getting a new lock and key every month, should you desire it. There’s also models where you can set specific PIN numbers for specific people so you know what happened, by who, and when; should anything go awry.

For an extra sense of doorway security, consider popular doorbell camera options. Even upgrading an old non-working doorbell can help better alert you to guests on your doorstep.

Security isn’t just for entry doors and doorways. Secure closets and storage spaces with interior versions.

Non-Locking Doors:

“Passage doors” (doors without locks) are fantastic places to introduce a little decorative flare. Consider these “pretty” door knobs that are faceted shimmering glass, brushed brass, or oiled bronze.

Speaking of non-locking doors; you can even update dresser and cabinet pulls to match your fancy new door knobs with these options.

Sliding Doors:

Bring an old patio door back to life with new slider hardware.

Don’t Forget the Garage:

A garage door might not have traditional handles, but that doesn’t mean you can’t give this door a simple update with accent magnets, keyless entry, and rubber moulding to help keep the rain out during storms.

Fence Gates:

You can even update old rickety fence door handles. (However, updating the whole fence tends to warrant a professional.)

How will you be sprucing up your home this spring? Share your home project wins with us on our social @DeAnnaAndCompany 

Curb Appeal

Choosing the Perfect Christmas Tree!

Does shopping for a tree leave you confused? We’ve got our tried and true tips for picking the perfect tree whether it’s artificial or real.

Artificial vs. Real Trees? Which is better?

It’s really up to you, there is no one option that is “better” than the other. This is really a question of your personal aesthetics. Modern artificial trees are pretty convincing in look and feel, yet there is also something magical about the smell and look of a real tree.

If you still can’t decide, consider your home’s storage space:

  • If you have space to store it, an artificial tree is typically less maintenance because it doesn’t have to be watered.
  • If you are short on space, a real tree is great because you get rid of it at the end of the holiday season. Note: real trees are more maintenance because they need regular watering to stay green and not turn into a fire hazard.

Think of a real tree as a giant bouquet of flowers,

no water = no longevity.

Start with the basics, know your numbers:

    • How tall are the ceilings in the space where the Christmas tree will be displayed? Ideally, your tree should have at least a foot or two of space over the top of it. No one wants a smooshed angel.
    • How wide is the area?
    • Bring a tape measure with you to verify your selection. Don’t end up like the Griswold’s. 😅
    • Trees on the lot are usually LARGER than you think. Trees bought online or in a box are often SMALLER than you think. (We’ll get into why below.)

How to choose an artificial tree:

  • If shopping online, or by an unopened box, trees are often smaller than we think. They are measured from the tallest point on the tree, which is usually a long stick to hold the tree topper. I bought a 3′ tree online, and it seems much smaller than that in person, but when I measured it, it is exactly 3′ to the tip top, and that top stick is about 7″ on it’s own.
  • Pre-lit trees are beautiful, but don’t count on it lasting forever. The lights on these go out as often as a string of lights would. However, they do make it much easier to concentrate on the fun parts of decorating, rather than untangling strings of lights. Just know at some point, you will probably need to supplement pre-lit trees with string lights.
    • You can extend the life of the tree and lights by storing the tree in a cooler place like a closet, rather than a garage or attic.
    • Keep the box. Follow breakdown and set up instructions for optimal performance.
    • Look for tree options with LED lights, as they often have a longer shelf life and cost less to operate.

How to choose a real tree:

  • Shop at a tree lot, where the trees have been sustainably harvested – ideally from a Christmas tree farm. Trees that are harvested properly, shaped, and cared for often last longer.
  • Look for green needles. A healthy tree will have springy needles on somewhat flexible branches. If the needles immediately fall off and the branches are brittle, the tree is too dry.
  • Be cautious with festive “colorful” trees: sometimes the vibrantly colored trees can be hiding imperfections or a withering tree.
  • Remember: trees on the lot or farm will always LOOK smaller than they actually are because there is so much open space above and around them. Be sure to measure.
  • Timing is everything: The trees are usually freshest and most maintained at the start of the holiday season. The longer trees are sitting on the lot (especially in the Florida heat) the more dried out they become.

Live tree care is pretty simple:

  • If the x-mas tree lot has the service or if you are confident doing it yourself, cut an inch or so off of the trunk to assure the tree is drawing enough fresh water to sustain itself.
  • Top off the water often, we do it daily – you’d be surprised how much water a tree drinks!

The best kind of stands for live trees:

After trying every kind of stand on the market, the ones that are a wide solid base are the best. (Like these options found on Amazon, shown above.) The water stays inside, the stands don’t tip, there’s no assembly required, and the screws make it possible to hold varying sizes of tree trunks. (Even uneven trunks.)

If you’re choosing between trees that have already been wrapped up:

Sometimes big box stores like Walmart sell trees that are already wrapped up. These are a little trickier to choose from, but:

  • Inspect the top of the tree area to ensure it is full all they way up to the tallest point.
  • Look for an even body of the package. If it sinks in on one side, that side is less full.
  • Look at the trunk where it is cut, it should look fresh and light brown.
  • Again, look for green needles. A healthy tree will have springy needles on somewhat flexible branches. If the needles immediately fall off and the branches are brittle, the tree is too dry.
  • If there are ones sitting in water, and ones laying out on a fence – start with the ones in the water. They have been kept hydrated.
  • When you unbundle your tree, don’t panic if it looks smooshed. It takes a little while for the branches to fall into place.
    • Set the tree in it’s stand with water, unwrap and gently train the branches.
    • Leave the tree to hydrate in the stand for an hour or longer before decorating. The tree should be settled by then.

Christmas trees might be our absolute favorite thing about the holiday season!

Share your tree designs and tips with us on our social!

Tag @DeAnnaAndCompany on Facebook or Instagram.

Home Hack

Ultimate Thanksgiving Leftovers

We love Thanksgiving leftovers more than Thanksgiving Dinner itself! We’ve rounded up all of our favorite ways to dish up those day-after helpings.

Note: These links are from various cooking blogs we found on the internet. We have no association or affiliation with any of these sites, we just love the recipes! Links open in a separate window.

Make Quiches!

Green Bean Casserole Quiche

We found this idea using left over green bean casserole here. They suggested using a basic quiche recipe from Sally’s Baking Addiction here. Then, they augmented the quiche to be Thanksgiving-focused:

“Here’s a tip: Buy an extra frozen deep-dish pie crust before Thanksgiving, then bring it out over the weekend to whip up a quick quiche with the rest of your green bean casserole.

Follow the basic quiche ratio of 4 large eggs, 1 cup dairy (whole milk, half-and-half or cream), 1 cup shredded cheese and 2 cups vegetables or other mix-ins to fill your pie crust.

Pre-bake the pie crust shell according to package directions, then fill and bake at 350 degrees Fahrenheit for 45 to 60 minutes, until the quiche no longer jiggles in the center. Let rest for at least 15 minutes before slicing.”

Delicious Pull Apart Sammies:

To be honest, we make these with turkey or ham all year! https://bestrecipebox.com/thanksgiving-leftovers-pull-apart-sliders/ 

Munch with Crunch:

Do we love Crunchwraps? YES. Do we love Thanksgiving Crunchwraps? ABSOLUTELY! https://cookingwithjanica.com/thanksgiving-leftovers-crunchwrap/ 

Thanksgiving Pizza:

It’s not your ordinary pizza, it’s holiday pizza! Mmm… https://www.landolakes.com/recipe/20559/thanksgiving-leftovers-pizza/ 

Holiday Sandwich:

A sandwich never tasted so good! https://www.delish.com/cooking/recipe-ideas/a25103566/thanksgiving-sandwich-recipe/

Leftovers Rigatoni:

Creamy, rustic, rigatoni deliciousness! https://www.goodhousekeeping.com/food-recipes/a29429290/turkey-pasta-casserole-recipe/ 

Potato Leek Soup using leftover mashed potatoes:

Give those mashed potatoes a longer shelf life! https://www.goodhousekeeping.com/food-recipes/easy/a29428925/potato-leek-soup-recipe/ 

Cranberry Hand Pies using leftover cranberry sauce:

Turn leftover cranberry sauces and jellies into a flaky pastry dessert! https://www.oliveandmango.com/cranberry-hand-pies/ 

Turkey Black Bean Enchiladas:

Great for those wanting a completely different taste profile for their Thanksgiving surplus. https://www.simplyrecipes.com/recipes/turkey_enchiladas/ 

Waffles using leftover stuffing:

Waffles? Good. Stuffing? Goooood. https://www.justataste.com/thanksgiving-leftover-stuffing-waffles-recipe/ 

Save those Potato Skins:

Turn those normally tossed potato skins into this twist on the classic. Perfect for munching on while watching all of the games! https://www.threeolivesbranch.com/thanksgiving-leftovers-potato-skins/ 

Do you have a favorite way to refresh your Thanksgiving feasts?

Share your favorite recipes with us on our Instagram or Facebook posts this month!  @DeAnnaAndCompany

Curb Appeal

Fall Table Decor

Autumnal Tablescapes

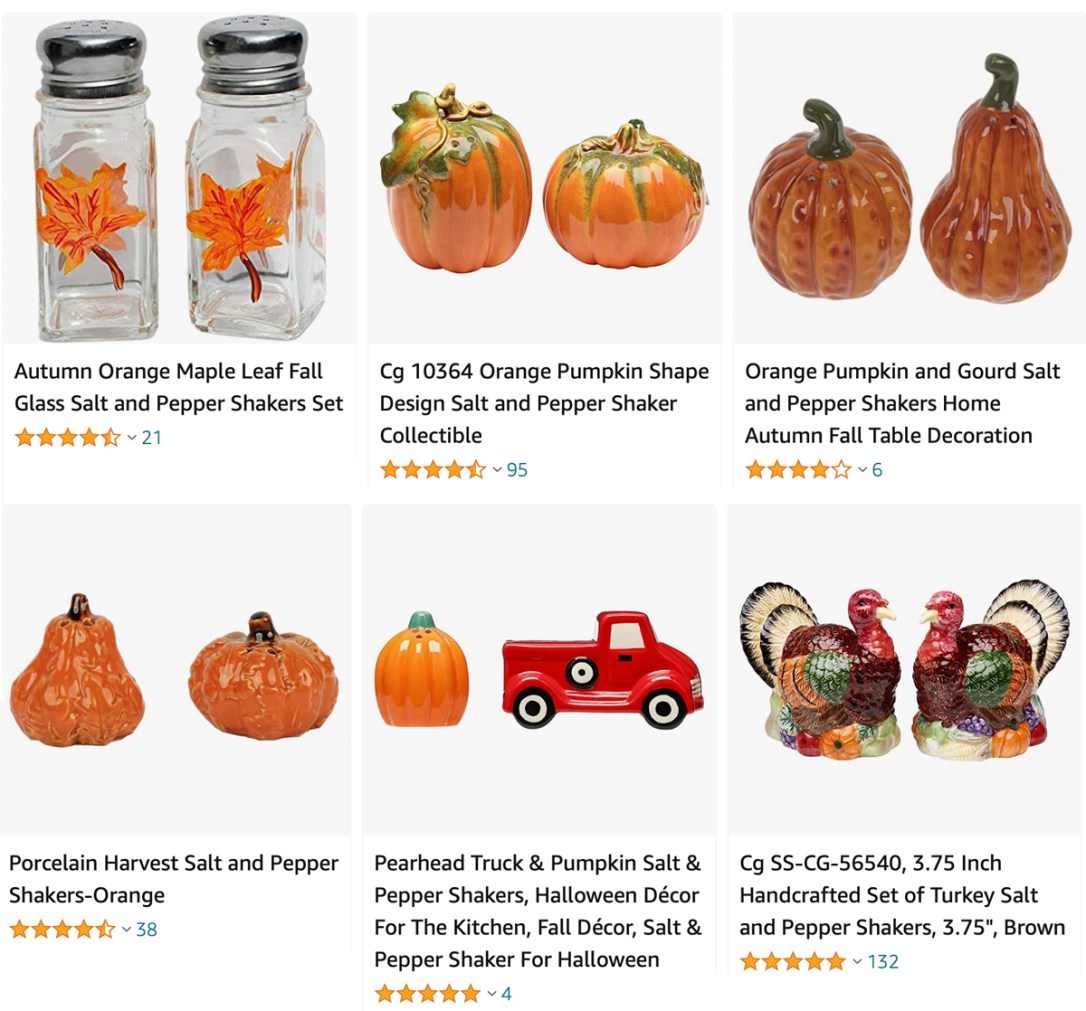
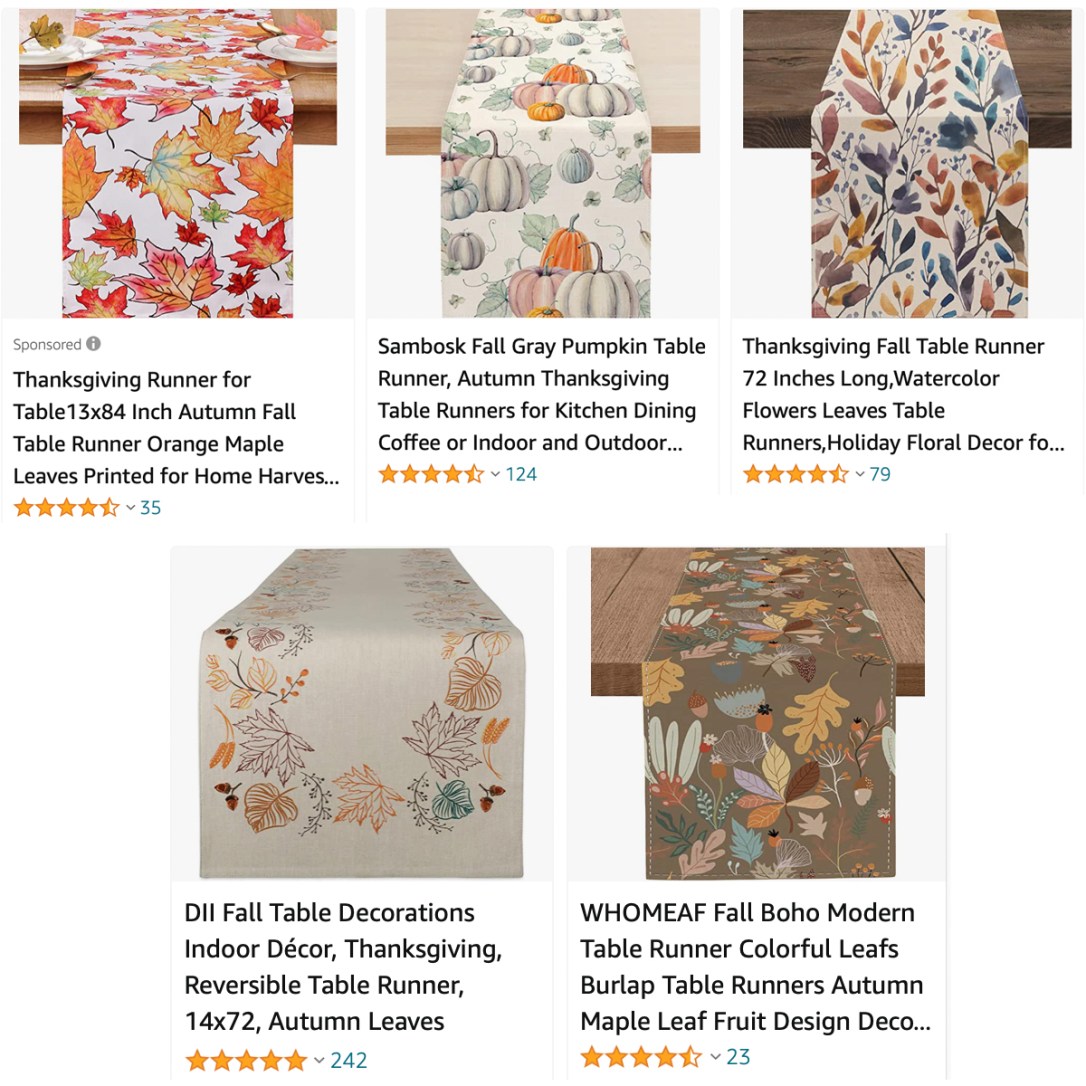
A tablescape doesn’t have to be extremely elaborate to be enjoyable. Using simple things like fall colored vases, candles, with seasonal ceramics and crockery can create a wonderfully inviting table for the big meal. Here are some ideas to get you brainstorming.

When gathering items, think “FALL” colors: creams, mustards, oranges, cranberry reds, chocolate browns, etc.

You might already have everything you need! These common household items can make charming tablescapes: 

    • Candles and votives (Don’t light them though, it gets too hot, and becomes a fire hazard when guests are jumbling dinner plates. Opt for LED pillars if you’d like the flickering ambiance.)
    • Small frosted vases
    • Decorative teacups and kettles
    • Creamers, saucers, salt and pepper shakers
    • Cake plates
    • Wooden bowls, spoons, plates
    • Mix and match place settings

Get Creative:

  • Create a grateful jar, where guests can write down things they are grateful for this year, and place them into a cookie-type jar at the center of the table; read the submissions together over dinner or dessert.
  • Add texture to your design with (*washed and air dried*) sprigs of pine, twigs, leaves, or pine cones you find in the yard.
  • Arrange a variety of small photo frames with pictures of:
    • Joyous shared occasions, milestones, and celebrations
    • People, pets, and things you (the host) are grateful for
    • Invite guests to bring small photos of people/pets/things they are grateful for, share stories about the photos
    • Old black and white photos
    • Photos of older friends and family when they were very young, ask them about the photos
    • Pretty photos of fall nature
  • Hand lettered name cards
  • Fancy folded napkins – we used this video on YouTube.
  • Make focal arrangements with faux pumpkins, or miniature real pumpkins and squash

However, if you’re looking to *up* your fall table decor game, check out these finds from Amazon!

Pumpkin Soup Bowls:

Autumn colored/themed Dinnerware:

Harvest Colored Drinkware:

Reusable Name Plates:

Pumpkin Salt and Pepper Shakers:

Remote Controlled LED Fall Candles:

Fall Decoration Stems:

Autumnal Table Runners:

Best Browsing for Fall Finds:

Some of our favorite places to browse for fall decor is right here around town!

Big box retailers: Tuesday Mornings, Homegoods, TJ Maxx, Michael’s, Ross, and Hobby Lobby never disappoint with their seasonal offerings.

Try antiquing: Renniger’s, the various shops in downtown Mount Dora, and the Antique District near downtown Orlando have a good selection of antiques in fall colors and holiday themes too.

Pop-Up Markets and Craft Festivals: Winter Garden, Sanford, Mount Dora, the Milk District in downtown Orlando, and the Audubon Park area near Leu Gardens usually have fall and holiday themed festivals with many vendors offering holiday decor.

If you know of additional places around town for holiday decorating finds, share with us on Facebook or Instagram: @DeAnnaAndCompany

Thanksgiving is really about being together and enjoying each other’s company. Decorating should be simply for the fun of it. Any design elements you incorporate to the table are a bonus on this day of gratitude, not required to make your meal more meaningful.

HAPPY THANKSGIVING from D&CO.