Curb Appeal

Hedge Trimmers and Edgers: Which is Best?

Electric vs Gas vs Battery Hedgers/Edgers/Trimmers – Which is Best? 

When it comes to buying new landscaping and lawn equipment, we always find ourselves at a crossroads. From plug-in electric, to rechargeable batteries, to gas powered – so many options make it nearly impossible to choose which is best with any certainty. Fear not! We recently upgraded our tools and are here to share our experience.

After owning the plug-in corded and manual landscaping tools over the years, using gas-powered ones, and then recently purchasing the electric rechargeable battery kinds, we feel confident in recommending this particular brand.

E-GO, purchased at Lowes Home Improvement.

lawn equipment

We choose this brand and could not be happier with our purchase. Our lawn (edging) is small, but we have a lot of bushes and plants and find these rechargeable electric (battery/cordless) products perfect for our needs.

The Pros:

  • We can trim without re-charging the battery at least 2 to 3 times.
  • The batteries are compatible with multiple E-GO tools, so you can swap them between tools with ease.
  • More powerful and reliable than our plug-in corded models.
  • Performed just as well as the gas powered options we’ve tried.

The Cons:

  • If the battery dies during use, you have to wait while the batteries charge.
  • The battery charging fan has a funny smell when charging, so we don’t feel comfortable charging them inside the house.

electric landscaping tools

These are literally the only cons we can come up with. We think our E-GO is awesome! The performance is honestly better than all of our previous plug-in electric models. The cuts are clean and it’s rare (if ever?) that this E-GO hedger/trimmer has gotten stuck in the branches of hedges while trimming.

rechargeable battery for lawn equipment

The battery system is pretty straight forward. Slide it on the charger to charge it, it has a light indicator to show when it’s fully charged. Then you slide it on to whatever E-GO tool you want to use and go! I usually find myself needing to charge it after every third use.

Most of the tools have an option to buy with the battery at a BIG savings versus buying the battery and charger alone. We have one battery for two E-GO tools. I swap the battery between the hedger and the edger with no problems. If you have more than one person working on tool – related yard tasks you may want to opt for more batteries.

Do you have any landscaping tools that make your life easier? We want to hear about it! Share your finds with us in the comments of our social media posts about this article. @DeAnnaAndCompany on Instagram and Facebook.

Note: This is not a paid endorsement or ad. We actually researched and purchased these items all on our own.

Curb Appeal

Front Door Face Lift

Painting the front door can refresh the look of your home in just an afternoon. Learn how-to’s, the products we used, and get some color inspiration below!

Q: Do I need special paint?

“Front Door Paint” as seen on Amazon

A: We recommend a paint that is formulated for use on doors. We choose Modern Masters “Front Door Paint.” It had almost five stars on Amazon, so we felt pretty confident it would work well for our door. The paint is made by Rustoleum, and was available in a lot of fun colors. The “Calm” color performed perfectly and covered everything on a previously burgundy colored door exactly as anticipated without a primer. After painting a standard sized door with two coats plus detailing, there was more than 3/4 of the jar left over.

Q: What color should I choose?

A: Coordinate the front door color with the home’s exterior color.

Choosing colors can be tricky. Ideally, you should choose a door color that coordinates with your home’s exterior color. Visiting paint brands online, like Sherwin-Williams or Behr, is helpful for choosing colors and visualizing. Find the color of your home (or one that is similar from their paint options), and see what “coordinating color” suggestions pop up for accents. Those coordinating colors should give you a simple way to explore color options for your front door. Many paint brands’ websites allow you to upload your own photo for testing colors to make visualizing even easier.

OKAY, LET’S PAINT!

Q: What materials will I need?

For Prepping the Door:

  • Sandpaper
  • Multisurface Cleaner
  • Paper Towels
  • Painter’s Tape
  • Primer as needed (depends on your current door color)
  • Newspapers to protect floor from paint drips

For Painting:

  • Paint formulated for doors
  • Art brushes for details
  • Small roller brush
  • Paint tray
  • Paper towels/damp rag for drips and mistakes

Turn That Drab Door Fab!

  • Clean the door and frame thoroughly, ideally the day before you intend to paint – so that the area has time to dry completely before you begin. Pay special attention to cleaning and detailing the hardware like the handle and the key insert. Get them looking shiny and new so your door looks tip top when it’s finished.
  • Lightly sand any rough spots as needed for a smoother application
  • Keep in mind: If you are choosing a new door color that is lighter than your current color, (example a black door that you want to make light pink) you may need to use a door primer paint first. Primer and let dry before using the door paint.
  • Use painter’s tape to mask off any areas where the paint could bleed over: glass panes, edges, hardware, moulding, house trim, etc.
  • Use a small roller to paint the majority of the door.
  • Use art brushes to hand-paint the details/places the roller cannot get to; around handles, windows, edges, corners, etc.
  • Roller the door with a second coat after you have completed hand-painting the details. This will help to blend any brush marks.
  • Leave the door slightly open to dry* so your wet door doesn’t become painted shut or ruined where the door frame meets the door front.

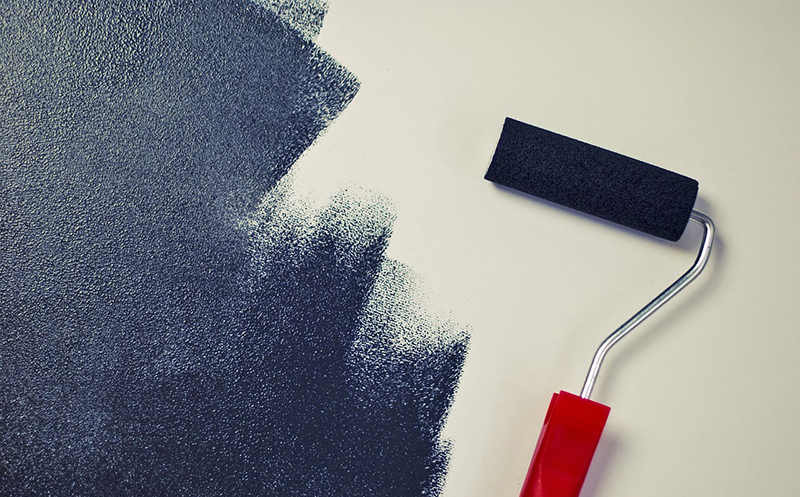
PRO TIP: Paint the door in thinner even layers. Too much paint on the brush or roller leads to thick drippy layers that run before they get to dry, leaving visible streaks and drips on the door.

  • Even if you roller and paint perfectly, sometimes paint just drips. If you notice drips, use a brush fix them (scoop them up) while they are wet.
  • If the roller is slipping or paint is running, you’re probably using too much paint. Try working it into the brush or roller using the ridges of the paint pan before you paint on the door.
  • Once the door has dried, you may notice some see-through spots. Use a roller or hand brush to evenly cover those areas.

We can’t wait to see your door updates! Share your photos with us via email, and we may feature your door on our social media! @DeAnnaAndCompany

Curb Appeal

Create an Instant Butterfly Garden

Grab the garden gloves! Today, we’re creating a not-so-secret garden that continuously attracts beautiful butterflies and their whimsical friends. The best news is, you can create a butterfly garden on a small budget with just a few good plants – which means you can have fun growing your garden by collecting plants little by little if the need be.

D&CO. PRO TIP: Buy in threes. Three always seems to be the magic number for how many plants to buy, especially when starting out. Grouping three of the same plants together (planting a few feet apart for growth) usually makes the best visual, and also makes it easy for butterflies to find.

Most of the plants that attract butterflies love the Florida sunshine, therefore a great area for a butterfly garden is one that has at least part sun – check plant labels or with an associate for specific plant care and warnings*. Butterfly plants are usually simple looking, with lots of green leaves and small flower accents. A butterfly garden should grow a little more wild than be perfectly trimmed and shaped all the time, if you want the plants to attract the most winged visitors. (Too frequent trimming gets rid of flowers and buds, which are what attracts the butterflies.) Approach your butterfly garden design more like you are building a theme park for butterflies, than creating a traditional tightly manicured garden.

Common Butterfly Attractors:


Monarch Caterpillar eating Milkweed leaves

Milkweed
The easiest way to get butterflies to show up in your yard is to plant some Milkweed. Milkweed is a host plant for Monarch butterflies and comes in a few varieties. We like the type pictured here best. It’s labeled a “host plant” because Monarch butterflies lay their eggs on the plant so caterpillars have something to eat when they hatch. The caterpillars will eat this plant down to a nub. Don’t worry, the plant continuously leafs out and grows back again. We suggest planting it behind or among other plants so that you don’t notice as much when the caterpillars eat it all – and they will absolutely eat it ALL! Note: Milkweed is toxic to nearly everything but the Monarch caterpillar, so keep it away from curious children and animals. 


Penta flowers with butterfly

Pentas
These tiny star flowers come in a variety of colors and attracts butterflies, hummingbirds, honey bees, bumble bees… all of the little creatures that make a garden magical. Note: Some varieties are long and leggy, some are neat and shrub-like. Be sure to check labels or ask an associate about the type of penta you are purchasing, so that you know what space is best for planting it.


Yellow Shrimp Plant

Shrimp Plants
Shrimp plants have flowers that kind of look like little shrimps from a distance. It’s a butterfly favorite in any color. Note: Hummingbirds LOVE this plant too. In our yard, they seem to gravitate to the red variety. 


Plumbago with lots of flowers!

Plumbago
This one is a large loose bush that butterflies and hummingbirds love. You want to keep it a little wild so that the flowers are always plentiful and present – it’s what the butterflies are attracted to and feeding on. 


Plumbago

By adding all or any of these four simple butterfly attractors, your garden is sure to be a hit with all kinds of butterflies.  

Share your butterfly gardens with @DeAnnaAndCompany by using the hashtag #GrowWithDandCO

* Keep in mind: some plants can be toxic to animals and humans. Be sure to check labels and with a knowledgable plant associate for information. Additionally, it’s a good rule of thumb to always wear gloves and eye protection while gardening, and to thoroughly wash hands/shower after.