
Nothing says July like homemade ice cream. We use this method in our FAVORITE ice cream maker, the Cuisinart from our post: Kitchen Gadgets Worth Owning!

Make the base a day before so it can chill for a good length of time. Using a cold ice cream base will form your ice cream quicker and with a nicer texture too.
Supplies
- Small CLEAN Dish Towel
- Ice Cream Maker
- Mixing Bowls, Wooden Spoon, Wire Whisk, Silicone spatula…
- Freezer-Proof Storage Container with Lid.
Ingredients
- 1 cup 2% Milk
- 2 cups Half and Half
- 1 cup Sugar
- 1 teaspoon Vanilla
- 3 tablespoons Hershey’s Dark Cocoa Powder
- 1 large Hershey bar, snapped into pieces.
Directions
PREP WORK
8 to 24 hours before using the ice cream machine:
Get stuff cold. Place ice cream maker reservoir in freezer overnight or for a few days.
Prepare the base 8 to 24 hours before you intend to turn it into ice cream in the machine. This will give it enough time to get thoroughly cold, which will create better ice cream.
Our “base” is basically like a concentrated hot cocoa from scratch:
-
- In a cold medium sized sauce pan; add half-and-half, sugar, and pieces of chocolate. Place pan over medium-low heat, slowly heating and stirring the mixture with a whisk until the chocolate is melted and you can no longer feel any sugar grain textures as you stir the bottom of the pan. (Use a silicone spatula to make sure you get any hidden lumps along the walls and corners of the pan.) Turn off stove and remove from heat.
- Place the cold milk in a large mixing bowl, and set it aside to adjust to the room temperature while you finish the base.
- Use a silicone spatula to stir vanilla and cocoa powder into the warm base. Allow mixture to cool for two minutes.
- By a large spoonful at a time, slowly incorporate the chocolate base into the bowl of the cold milk until it is all combined.
- Place base mixture back in refrigerator for 8 to 24 hours to chill.
Pro Tip: Experiment swapping out the chocolate for other flavors. We’ve used this cooked base method to make fruit flavored ice cream too.
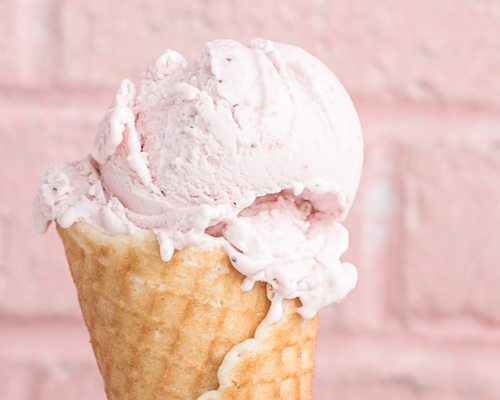
- Strawberry Ice Cream: Slice strawberries (or other fruit) and place in a bowl with a bit of sugar sprinkled over them and let sit for 20 minutes.
- Spray a frying pan with cooking spray and cook strawberries (reserving juices) over medium-low heat until softened. (Don’t burn them, they just need to be softened.)
- Use a silicone spatula to add the contents of the frying pan, and the reserved juices, to Step 1, where you would normally add pieces of chocolate.
Now freeze the chocolate mixture in the machine. Follow your machine’s instructions. Our method is:
- Put the ice cream tools like the mixers, containers, bowls, and spatulas in the refrigerator (NOT the freezer) about an hour before you start making ice cream to get them nice and cold.
- Set up your work space. Plug in your machine and gather your tools. You will want to move fast so have everything you will need at the ready. Retrieve the frozen reservoir and mixing paddles last to ensure they are as cold as possible when you start churning. Assemble the machine, and move very quickly to start making.
- Turn on your machine. Slowly pour the chocolate base mixture into the churning reservoir. Watch the liquid levels, as the mixture expands as it freezes and could overflow if too full.
- Place the clean folded dish towel over the hole to keep the cold air in. Return any unused portion of the base mixture to fridge. You can make more later!
- Set timer for 20 minutes before peeking at the progress under the dish towel. Inspect quickly to keep as much cold air in as possible. Check again in 10 minutes. Note: the machine noises start to change slightly as the mixture freezes and gets harder to turn.
- When your ice cream is set, turn off the machine. Remove the paddle. Quickly stir in any mix-ins with a silicone spatula, and transfer mixture to a freezer safe storage container.
Ice Cream can get a little melty in the process of mix-ins and transferring. Freeze for 10 minutes before dishing it out.
Pro Tip: When it comes to mix-ins, we found most chocolate chips and various candies got way too hard when they froze in the ice cream. Magic Shell type chocolate worked great for making our own chocolate bits or using as a topping. Snacks we could turn into crumbs, like Butterfingers and Oreos worked well too.
Cooked fruit that is then chilled (strawberries, bananas, peaches, cherries, etc.) makes better taste and texture than just mixing in fresh slices at the end.
