
In our houses, charcuterie boards are a year-round occurrence, but there is something about the fall and Thanksgiving that make these displays even more fun to create. If you’ve never heard of “charcuterie boards,” it’s just a fancy term for meat and cheese displayed on a board or tray. Even your Thanksgiving relish tray could be turned into charcuterie with the right presentation and a few key ingredients.

Let’s make one!
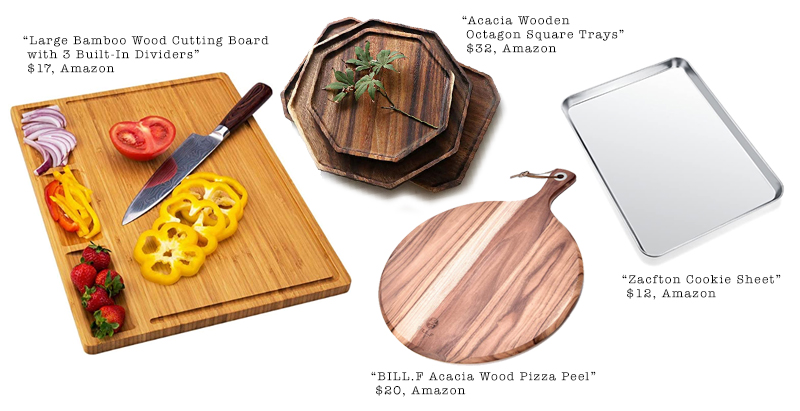
First, you’ll need a charcuterie board. We recommend any food-safe flat surface – ideally with a small lip or edge. It could be anything from a nice cutting board to a wooden plate or small serving tray. You want whatever you use to be food grade and visually appealing. We found several options on Amazon. We used the search terms “charcuterie board,” “cutting board,” and “wood plates” and these are some of the options that popped up:
If you already have a nice chopping board, serving dish, or baking sheet at home that works too! Just make sure its nice and clean.
The ingredients:
Your charcuterie boards can vary in size from personal to party. We think a good place to start is with at least five items. (For example, two types of meat, two types of cheese, and crackers) The boards can be themed: savory and sweet, vegetarian, desserts… the sky is the limit. Here are some combination ideas to get you started.
The Mansion: Summer Sausage, Pepperoni, Deli Ham, Prosciutto, Deli Turkey, Olives, Mini Pickles, Cheddar Cheese, Pepper Jack Cheese, Swiss Cheese, Cheese Ball, Celery, Carrots, Club Crackers, Pretzel Sticks, Butter Crackers, Honey Roasted Nuts, Cinnamon Pecans
The Lake House: Smoked Salmon, Deli Ham, Apple Slices, Red Grapes, Cheddar Cheese, Pepper Jack Cheese, Port Wine Cheese Spread, Cream Cheese, Sun Dried Tomatoes, Club Crackers, Hard Bread Sticks, Wheat Thins, Toasted Bagel Rounds and/or Fresh Bagel Slices, Chopped Onions, Capers, Chocolate Kisses or Mini Chocolate Bars
The Candy Cottage: Apple Slices, Cotton Candy Grapes, Strawberries, Chocolate Covered Raisins, Honey Wheat Pretzel Rods, Vanilla Wafers, Graham Crackers, Cinnamon Pita Chips, Hazelnut Spread, Chocolate Hummus, Marshmallow Fluff, Large Chocolate Non-Pareils, and White Chocolate Kisses or Bark
The Garden: Bell Peppers, Carrot Chips, Celery Sticks, Broccoli, Cauliflower, Cherry Tomatoes, Mushrooms, Hummus, Fresh Ranch Dressing, Grapes, Apple Slices, Cinnamon Apple Chips, Cucumber Finger Sandwiches, Honey Wheat Pretzel Rods, Pita Chips, Caramel Dip, and Hazelnut Spread

The prep:
Some techniques to work with
- Make most items bite-sized
- Deli Meats and cured meat slices: roll slices into a little log, if logs are large you can cut them in half.
- Cured meats: slice into even bite-sized rounds
- Cheeses: cut into even cubes or cracker-sized slices, or use as focal accents with larger wedges and cheese balls
- Veggies: cut evenly – 3″ sticks, 1″ rounds, bite size flowerets, leave bite sized items like cherry tomatoes whole
- Fruits: cut into even wedges or slices, leave grapes and strawberries whole, fruit is usually a great fill-in item
- Use small glass prep bowls for spreads, dips, or other wet items
- If you want a garnish use fresh herbs or lettuce cups. Rosemary, basil, and chives are nice fresh options.
- Suggest pairings by putting items that go together in the same area. For example in The Lake House, the salmon, cream cheese, bagel chips, and onions are all things that pair, so you may want to keep them around each other when you display them.
- Don’t forget the tongs, scoopers, small spoons for dips, cheese knives, etc.
The presentation:
The layout is all about your groupings. You want to work around the board, ideally beginning with three groupings. Start with the high traffic items, usually that means the meats/proteins. Place them in larger groupings, at three different spots on the tray to form a triangle.
Place your prep bowls (for any dips and sauces) next
Place your cheeses in groups around the meats, again in three groupings if possible.
Now fill in your board with groups of items that use specific prep bowls – fruits near sweet dips, veggies near dressings, etc.
Place your drier items (chips/crackers/breads) in groups near the cheeses, or on separate plates that surround your board.
Finally, place remaining items to fill in any gaps. Grapes and apple slices are great filler items.
Kinda like this:

Voila, just like that, you’re a charcuterie pro! Don’t forget to share your charcuterie masterpieces with us on Facebook and Instagram!
